In Clive Barker's Hellraiser: Revival, you'll have to escape the cult's hideout, find Sunny, and survive your journeys through the Labyrinth. In this detailed guide, we'll cover every story objective, help you solve the puzzles, and show you how to defeat the story bosses.
In Hellraiser: Revival, it's easy to waste your last bullets on an enemy you could have crushed with a trap a minute later. So here's our approach from the start: whenever possible, deal with ordinary enemies using melee weapons and environmental objects, and save firearms for dangerous groups and bosses. This goes double for the shotgun. We'll need it more than once. During a chase, however, forget about killing everyone. If a Cenobite is after Aidan, the objective is usually to find a way out.There's no chapter select that lets you freely return to previous areas. Save before moving into new areas and check side rooms before following the next story objective. We'll point out useful weapons, inventory expansions, and some upgrades along the way, but the route below focuses on finishing the story. If you want to collect every upgrade, check our separate weapon and inventory upgrade guide.
Prologue - How to Complete the First Labyrinth Trials
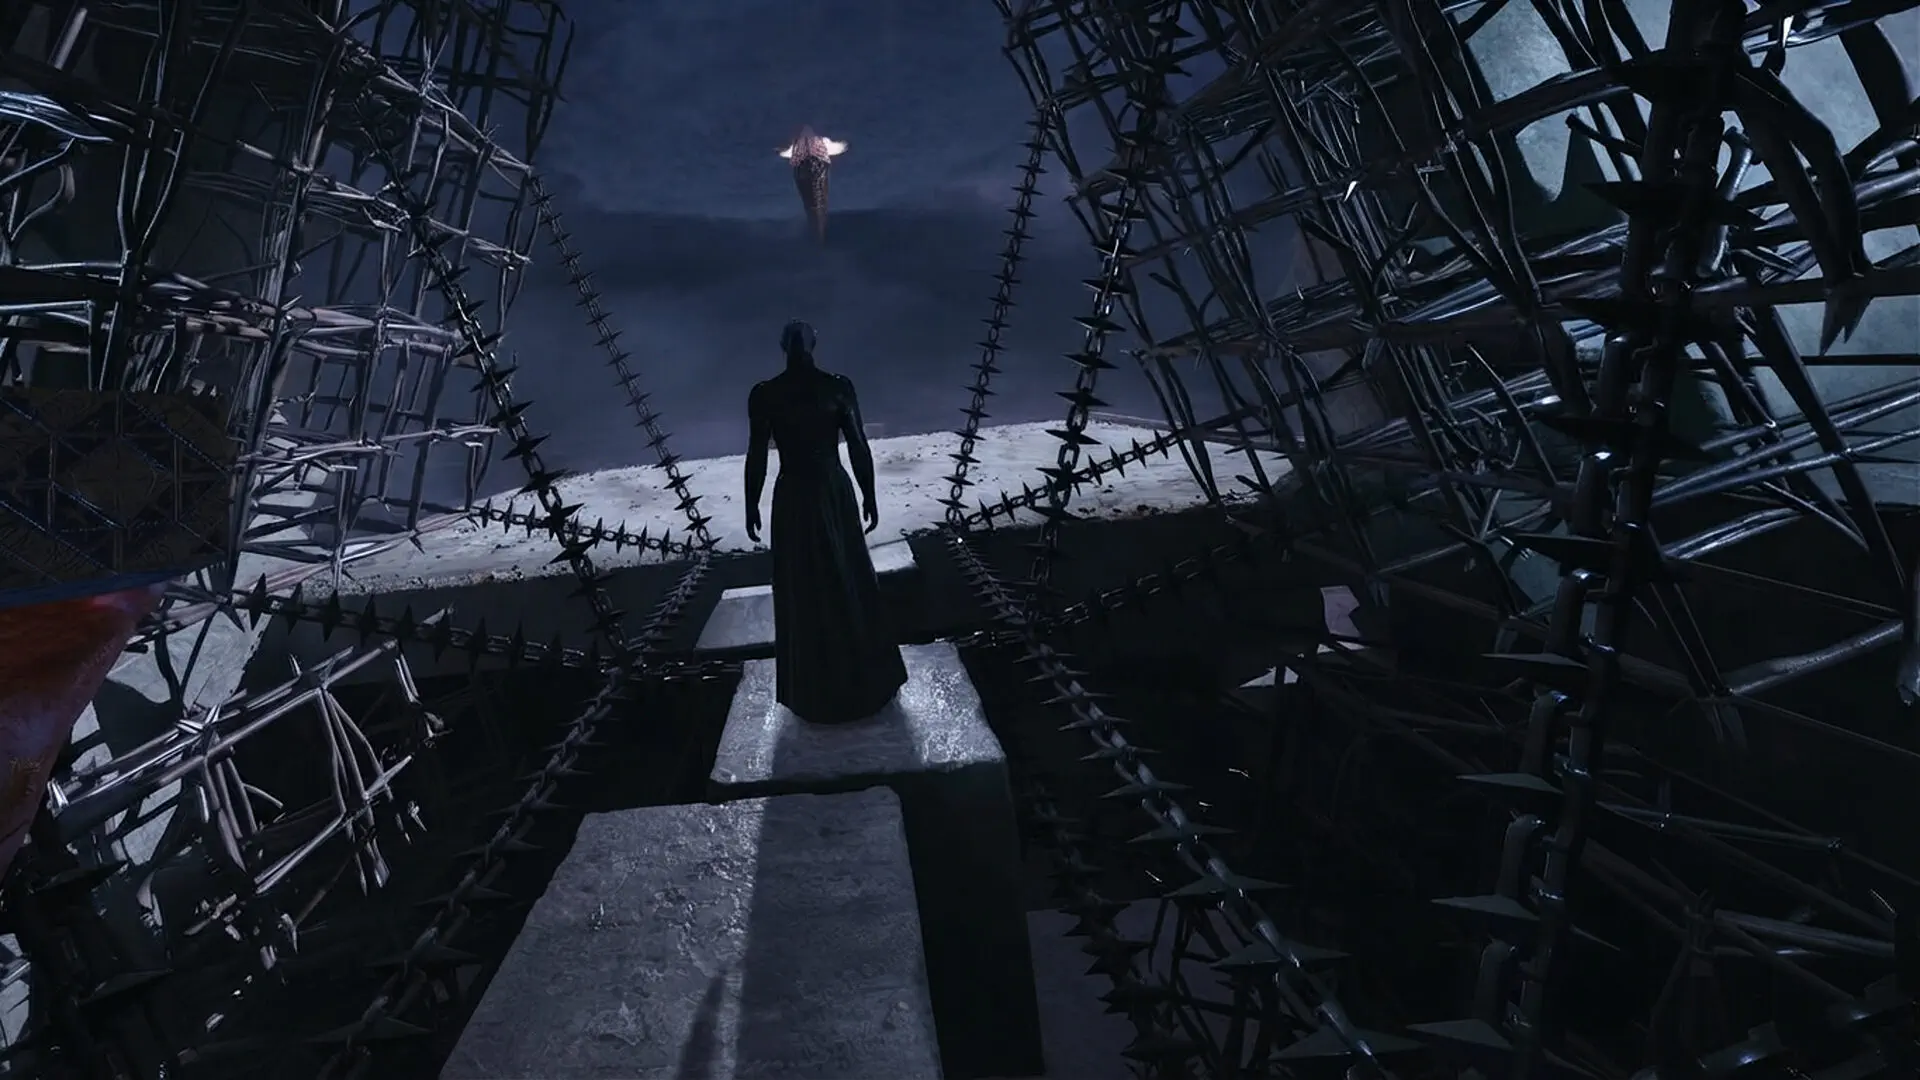
Follow Sunny and use the blue fire to find your way. The first pressure plate briefly opens a passage. Step onto it, wait for the mechanism to move, then run toward the door. You'll need to slide under the next obstacle. This is where the game introduces the rhythm of its traps: first work out what activates the mechanism, then move, rather than trying to run headfirst through a closing door.When a barred gate blocks your path, look for a low opening on the left. Crawl through the red tunnel and continue past the spider-like creature. In the looping apartment, pay attention to the message about darkness and turn around. The Labyrinth changes behind your back, so a dead end you already passed may lead somewhere new. Eventually, reach the pedestal with the heart.The next trial introduces the Genesis Configuration. Transfer fire between the designated mechanisms, then move the block to reach the platform with a button. Open the next passage and finish the introduction. The box will gain more abilities later, but for now you just need to understand the principle: when a mechanism lights up, it usually wants you to use the box.Image unavailable
Escape the Scarlet Church - How to Break Free and Open Door M359
When you wake up in the chair, free yourself one step at a time. Deal with the restraint on your hand, use the available hook, and cut the stitches holding the wound together. This is a scripted sequence, so watch the interaction prompts carefully. Once you can walk, examine the documents on the table and head into the corridor.The door marked M359 requires two pieces of an inset. They're on bodies at opposite ends of the corridor. Search both sides, collect the fragments, and return to the lock. Place the pieces in the recess to open the way. If the door doesn't respond, make sure you've collected both items. One fragment won't do it.Next, find the cultist outfit and change clothes. The disguise will get you through the first guarded section, although that doesn't mean you should sprint right up to everyone you meet. Make your way through the accessible rooms toward Bruno's office. Pay attention around the staircase and dumpsters. It's easy to get so focused on finding the exit that you miss useful items here.
Skull with Nails and the Tongue Key
There's a skull with protruding nails on Bruno's desk. Turn it so its face points away from you and press the fastenings in this order: left, back, right, top. The skull's starting position matters. If you're looking directly into its face, the sides will be reversed. Once you've solved the puzzle, take the Tongue Key and use it on the door with the open mouth.Image unavailableMoving on, you'll find Bruno occupied with his victim. Crouch and wait for a good moment, then take the keycard from the table. Go around him using the clear side of the room and leave through the door that requires the card. There's no reason to pick a fight on principle here. Our arsenal is still pretty modest, to put it mildly.There's an additional locked cabinet in the rooms with paintings. Its code is 9901. You don't need to open such caches to progress, but extra supplies make the early game considerably easier. To check the other locks along your route, keep our guide to all safe, cabinet, and door codes handy.
First Chase and the Library
As soon as the Chatterer appears, run along the newly opened route. Sprint through the corridors, duck under chains, and don't stop to examine things off to the side while he's close behind. This is a chase. Stopping to test how much damage you can take will only bring the loading screen closer. You'll have time to explore once the pursuit ends.After picking up the knife, use it for stealth kills whenever an enemy has their back turned. Continue through the green doors and rooms filled with bookshelves. In the bathroom, examine the body. The clue there is connected to the combination 9891 for the nearby cabinet. You can also find a poem by Emily Dickinson along the way.
How to Power the Exit and Get the Pistol
The door marked EXIT won't open until you restore power. Find room 206, interact with the electrical panel, and return to the exit. Beyond it, pick up the pistol beside the body. Your first firearm also unlocks crafting for its ammunition. That's useful insurance if you've already searched everything and still have enemies to shoot.Clear out the enemies in the prayer hall and search the service room. You'll find an inventory capacity upgrade and the Leviathan Tip here. Grab the extra slots right away. You'll soon be carrying more types of weapons and consumables, and the game isn't going to hand you a free pocket for every new discovery.
Leviathan Tip and the Rubber Duck
Return to the corridor with the strange construction and attach the tip. Rotate its sections until the lines on the adjoining parts form one continuous pattern. It's easiest to align the central section with one outer part first, then adjust the remaining one. Solving the puzzle rewards you with the S&M Duckie.Take it to the matching door in the service area and open the route upstairs. Yes, the key really is a rubber duck. Compared with everything else in this place, that's practically a normal design choice. Before leaving, make sure you've collected the inventory upgrade and supplies from the office. The club is your next major stop.
The Club - How to Reach the VIP Area and Recover the Box
Find the woman in white and complete her request by collecting three items around the room. Check the floor in the southwest, the table in the northwest, and the shelf in the northeast. Return to her once you have everything and finish the interaction. You'll receive the Rabbit Key, which opens the way through the VIP area.Image unavailableIf the usual exit is blocked, look for a route through the club's glass door. You can save and change into another disguise before entering the next room. Put on the outfit and head into the ritual area. After the cutscene, Aidan recovers the Genesis Configuration, but Charlotte decides to become a very persistent companion.Immediately run down the corridor. At the fork, keep right until you reach the green door. Don't turn around to land a few hits. Right now, you need to leave Charlotte behind. Once the immediate chase ends, continue down into the sewers for the next stage of the escape.
Escape Charlotte - Sewers, Van, and Cemetery
Zora, Telekinesis, and the Van Key
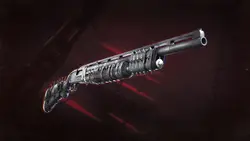
Down below, you'll meet Zora. You can buy recipes and supplies from her, sell valuables, and use your storage box. We recommend stocking up on healing items and the ammunition you need before considering expensive purchases. Some inventory items exist specifically to be sold, so don't carry your entire fortune around until the final boss.You'll unlock telekinesis during this part of the route. Pick up suitable objects and throw them at enemies to clear a path without wasting bullets. Watch your Suffering meter. The box's abilities consume this resource, so you can't use them endlessly without replenishing it. Dealing damage restores energy, and you can finish enemies that start flashing blue with the Genesis Configuration to get an additional refill.You'll find the van's rear door locked. Explore the nearby rooms, using the entrance with a warning sign to guide you. In the flooded room, take the safe route through the pipe and switch off the power first. You don't need to test whether the water is electrified with your feet. After encountering an armored enemy, take the Van Key from beside the body and return to the vehicle.Open the back and make your way through the van. Charlotte will give chase again in the forest, so follow the clear path and avoid the bear traps. After passing through the tree trunk, keep to the left path. The chase ends with a fall. Complete the action involving Aidan's injured leg, then look around near the body for the shotgun.
Shed Key and Cemetery Gates
Reach the church and save. To exit through the cemetery gates, you'll need an inset from the shed, and the shed itself requires a separate key. Enter the white house, go upstairs to the bedroom, and look beside the bedside lamp. Take the Shed Key, and check the cabinet containing an inventory capacity upgrade while you're there.Image unavailableIt's worth searching the house before heading outside again. The safe code is 9606. Once you've collected the supplies, go to the shed, open the door, and take the Cemetery Gate Inset. Use stealth on the way back, taking advantage of obstacles and gaps between patrols. You have a shotgun now, but that hasn't made Aidan immortal.Return to the church and place the inset in the gate. When Charlotte interferes again, shoot the hanging burning lantern. This will let you finish the sequence and move on. After meeting Pinhead, your journey to recover Sunny's soul begins. Now the corridors will be trying to kill us in a much more official capacity.
Free Sunny's Soul - The First Major Journey Through the Labyrinth
Rotating Diamonds, Mirror, and Moving Bridge
Start by following Pinhead. The mechanisms along his route stop moving, so take advantage of that. When your guide disappears, turn around and crawl through the low red passage beneath the chains. If you see an object beginning to transform, don't hang around to watch the whole performance. It's turning into a spinning trap. Run back and take the newly opened side passage.Keep moving past the traveling diamonds, timing your movements between their cycles. Where traps move vertically, reach the safe middle space first, then pass beneath the second mechanism. At a side junction, you'll find a Pain Pillar that increases your maximum health. Several diamonds guard the approach. Wait for the first ones to move in one direction, then pass the final one separately.In the prison sequence, approach the mirror and wait for the cutscene. Look at the photographs in the real room, then check the reflection again and perform the action that breaks the glass. The route continues behind the wall covered in photographs. Here and later on, returning to the same room doesn't necessarily mean you're lost. Sometimes the change happens only after you look back at a familiar object.At the bridge with rotating traps, use the box on its sections. Rotate the bridge so that the dangerous parts are on the sides and the middle stays clear. Cross the safe section and repeat for the next one. Trying to sprint through the entire structure in one go is far less reliable.
Descending Beneath the Lowering Ceiling
After talking to Pinhead, head down the spiral passage. Mechanisms extend from the walls and can knock Aidan off, and once you start moving, the ceiling begins descending. Cross the first set as soon as the obstacles retract. The next section operates in sequence, while the last one moves all at once. Take it in short bursts, without stopping right in front of an extending mechanism.At the bottom, reach the platform that stops the ceiling and leave through the newly opened side passage. At the next intersection, head toward the rotating diamonds. Beyond them, you can activate a Suffering Pillar to increase the box's energy capacity. Return by following the retreating trap and continue until the corridor changes.In the looping rooms with Sunny's silhouette, go through the doors on the right. When you reach the locked exit and the noose, interact with it to finish the story sequence and reveal the stairs. There's a save point beyond them. In the foggy area before the door with two blue lights, check the side route for another Suffering Pillar.
Changing Crossroads and Sunny's Pillar
In the room with several corridors, use the initially blocked passage as your reference point. First go around it through the adjacent corridor on the right. When you return to the center and see that the structure has changed, take the next available route around the obstruction, followed by the path opposite it. Each loop changes the central object. Keep going until the route leads to a prison sequence and another chase.Run from the Chatterer again. Use the opening detours and crawl under obstacles. In the sections with movable blocks, use the box to clear the way. After the chase, you'll emerge into a foggy area filled with ruined buildings. Work your way through the rubble to Sunny's pillar, divide the box into three parts, and match its shape to the lock.After the scene, the passage leads out of the Labyrinth. Aidan returns to Sunny and learns that he'll need the hearts of other marked people to continue. Fight off the enemies that appear and head outside. You'll meet Zora by the gates and see three damaged statues. Our next task is to restore their missing pieces.
Open the Gate to Charlotte - Where to Find the Statue's Hand
Bruno's Mansion and the First Fight
Find the small tool shed on the grounds and take the Bolt Cutters. Use them to open the route into the mansion's basement. You'll encounter Bruno downstairs. Keep your distance, use heavy environmental objects, and fire the shotgun when he's close enough. Don't linger in hazardous puddles or commit to a long series of hits when he's already preparing to counterattack.After winning, collect the valuables he drops and explore the house. Your main objective here is to find two figurines for the pedestal in the lobby. One is hidden in a gramophone, while the other is inside a cabinet with rotating discs. Until you've collected both, you won't be able to complete the chain of events involving the key and the statue's hand.
Gramophone and Bruno Figurine
Go upstairs to the music room and find the Winding Handle. Take it to the gramophone in the dining room on the ground floor. Attach the handle, wind up the mechanism, and collect the Bruno Figurine. Check the neighboring rooms before leaving. The house is fairly safe to explore after the fight, and you'll need supplies again soon.There's also a cabinet in the music room with a puzzle based on the date of a painting. Add 300 to the year 1666 to get the combination 1966. This cache won't open the story route, but it does let you bring more useful supplies into the next fight.
Rotating Disc Cabinet and Marlowe Figurine
In the upstairs office, examine the mechanism with rotating discs. Your goal is to point the light-colored triangles toward the center and line up the cutouts to release the central piece. Watch how the parts themselves are positioned. If you've already turned some discs, following someone else's exact number of button presses will only make things more confusing. Once the cabinet opens, take the Marlowe Figurine, the SMG, and the inventory upgrade.Image unavailableHead down to the lobby and place both figurines on their stands. You'll receive the Resurrection Key and the Statue's Hand. Prepare for an attack, as the room will no longer be safe. Defeat the enemies and use the key on the locked glass door.
Gas Room with Three Statues
Gas will begin spreading inside, so don't run around without a plan. Look at the painting and set the three statues to match it:
Statue with a spear - spear pointing upward.
Statue with a changing head - human face.
Statue with scales - both pans level.
Behind the painting that moves aside, collect the Bedroom Key and press the green button to shut off the gas. Go upstairs to the locked bedroom and examine the book. It contains the Security Card needed to leave the house. Return to the gates with the statues and attach the hand you found. Then reshape the Genesis Configuration to fit the opening in the mechanism and unlock the first route.
Statue's Head - How to Survive the Forest House Siege
Follow the newly opened path through the forest to the house. Both paths at the fork eventually lead onward, so feel free to explore the side route for materials. Blue exploding enemies leave behind dangerous patches. Wait for them to disappear instead of immediately stepping onto their remains. Inside the house, find the Statue's Head on the chair.As soon as you pick it up, the siege begins. Collect wooden boards and barricade the three windows, then fight off enemies at the breaches. Telekinesis and environmental objects will help conserve ammunition, while the shotgun is useful when someone makes it inside. Don't stand at one window with your back to the rest of the room. The direction of the attack gradually changes, and enemies will also come from above.At the end of the sequence, an explosion sends Aidan beneath the house. Before climbing back up, make sure you take the Crank Handle from the wall. Once you're out, leave through the back door and attach it to the bridge mechanism. Lower the bridge, return to the square, and give the head to the next statue. Adjust the Genesis Configuration's shape to open the route to the final part.
Statue's Tongue - Park, Well Blocks, and Underground Area
Where to Find the Three Missing Blocks
You'll learn how to transfer fire in the next area. Collect it from an available source using the box and direct it at enemies. This ability consumes Suffering, so there's no need to set every lone enemy on fire. The central well has an unfinished puzzle that requires three additional blocks:
In the elevated gazebo - take the block from the raised hand of the body. Be ready for an attack afterward.
On the boat by the dock - pull the boat toward you and collect the item. Enemies will emerge from the water, so retreat to a more open stretch of shore.
By the carousel - rotate the structure with the body tied to it and retrieve the block. Another wave of enemies will attack here.
Don't try to collect everything with an empty magazine. Each item effectively doubles as a button that summons trouble. Before taking the last block, prepare a source of fire or remember where the closest one is. If lots of enemies appear, gather them into a convenient spot before setting them alight. You'll get more value from a single use of the resource that way.
How to Open the Well
Return to the well, insert the three blocks, and examine the drawing nearby. Rotate all four images to match the clue from left to right. Check the paths between the buildings as well as their outlines, because it's easy to confuse similar-looking sides. Use these landmarks for the correct order:
Left - clouds of smoke and two short rectangular buildings.
Next - smoke, a small building, and paths resembling the letter H.
Third image - smoke and a large V-shaped gap between buildings.
Right - smoke and two tall towers on the right side of the picture.
Image unavailableEnemies will appear after you solve the puzzle. Don't trap yourself between them and the well. Clear the approach to the opening and climb down once it's safe. In the underground section, explore the room with the save point. The Statue's Tongue is on the table. Take it before looking for the exit.
Electrical Panel and Returning to the Square
Find the electrical panel connected to a long red wire. Restore the connections by matching the colors: red to red, yellow to yellow, and blue to blue. Once the circuit is complete, a door opens in the opposite room. If the lock doesn't respond, check for another disconnected wire instead of searching for a second story key.Image unavailableIn the next room, enemies spawn near an electrified area. You can turn off the generator to collect supplies safely, then follow the corridor toward the exit. There's an armored enemy near the end, and another can approach from behind. Make sure you have room to retreat first. Press the button, return to the square, and place the tongue in the last statue. The box will open the way to Charlotte.
How to Defeat Charlotte and Claim Her Heart
Before interacting with the altar, circle the arena to collect ammunition and locate explosive objects. The fight begins with ordinary enemies, and the police who arrive will help hold them off for a while. Don't waste that opportunity firing wildly at everything that moves. Deal with the enemies actually closing in on Aidan and save some supplies for Charlotte herself.When she joins the fight, keep moving and use fire. Lure her toward suitable barrels, ignite them with the box, and fire the shotgun after she finishes an attack. Don't stand directly in front of the boss waiting for one last perfect shot. Her charge and melee strike will quickly show you why greed is costly here. When Charlotte moves in, get out of the line of attack first, then retaliate.During breaks, she retreats and other enemies appear in the arena. Kill exploding enemies from a distance and watch for anything approaching from behind. Then return to the same routine: keep your distance, use fire, and shoot when you have a safe opening. After winning, collect Charlotte's Heart and the valuables before leaving the arena.
Give Sunny the Heart - Traps and the Looping House
The return trip to Sunny takes you through the Labyrinth again. At the start, check the route to a Suffering Pillar, then carefully inspect the paths near the spikes. There's another Pain Pillar in this section. These upgrades are especially useful before the second half of the game, so don't rush through every newly opened doorway. Our separate guide to all Pain Pillars has the full route to these artifacts.In the room with the pressure plate, move the block onto the switch that opens the right-hand door. Then use fire on the mechanism tied to the puzzle to free another block and change the obstacle's position. When the corridor with spikes and a rising ceiling opens, cross without lengthy stops. It's important to finish adjusting the mechanisms before you start running, not try to rearrange the room while the trap is already active.Next, you'll end up in a familiar house. In the first loop, interact with the phone, move on, and return to the altered location. During the next repetition, examine the printer and collect the photograph. Then check the upper floor and follow the looping corridors to the pink case. Going back triggers another change. Once these sequences are complete, reach the apartment and give the heart to Sunny.
Hunt Marlowe - Ticket, Multi-Armed Enemy, and Peephole Door
Back at the club, visit Zora. Her stock now includes new purchases, such as the Assault Rifle. You don't need it to finish the story, but anyone hoping to collect the entire arsenal should save some money. Those valuable items you found earlier will come in handy. There's no need to carry them around forever as lucky charms.In the eastern room, check the cabinet and take the Snake Key. Use it on the door with the matching symbol, then collect the Voyeur Ticket from the table. There's also an optional cabinet here with the code 1952. Insert the ticket into the device beside the door marked with a red star.Beyond it, you'll encounter a large, multi-armed enemy. Aim for its arms rather than repeatedly shooting the protected part of its body with the same weapon. Keep your distance, retreat after its swings, and use firearms when you can line up your shots. Once you've defeated it, take the Peephole Inset from the lower part of the route ahead and return to the corresponding door.Place the inset into the mechanism with the red peephole. Rotate the inner parts to align the diamond-shaped cutouts, remembering that turning one section affects the neighboring ones. Line up the inner components relative to each other first, then adjust the overall orientation. The first encounter with the Sister of Mercy begins beyond this door, but for now your job is to get past her.
Recover the Box - How to Sneak Past the Sister of Mercy and Escape the Labyrinth
Use stealth during the first encounter with the Sister of Mercy. Throw bottles to distract her, wait for a clear route, and climb the stairs to the exit ahead. Don't try to start a full boss fight prematurely. She'll have her own arena later. Right now, getting the box back is more important.In the Labyrinth, rotate the sections of the many-sided corridor to make them passable. After each adjustment, check that the floor of the next section is in a reachable position. There's a side passage leading to a Suffering Pillar in the third section. Don't move straight into the next corridor if you're collecting upgrades.In the room with moving staircases, find two blocks on the left. Use the box to line up their surfaces and create a traversable route, then apply fire to a mechanism in another part of the hall. This lets you reach an additional Pain Pillar. Pay attention to the height of the platforms rather than trying to match the decorative patterns on the cubes.During another chase from the Chatterer, use the movable block to cross the section with spinning blades. In the painting gallery, examine the tables that trigger further changes to the room, then continue through the opening passages. Finishing the sequence unlocks Hellchains. Practice using the ability against the enemies that appear. You'll need these chains not only for normal fights but also to finish certain bosses.
Private Rooms - Relief Block, Hobby Horse Key, and Skull
How to Get the Block from the Statue with an Ear
Back in the club, go upstairs and find the room containing a statue with an ear. Pull out its fastenings to free the Relief Block. When viewed from the front, the order is bottom right, top, middle right, bottom left. Collect the released piece and return to the private rooms door.Insert the missing block and look at the paintings above the entrance. Rotate the four relief images so that each matches its painting in order from left to right. The clue is directly above the mechanism, so you don't need to search another part of the club for a note. The door opens once everything is aligned correctly.
Where to Find the Hobby Horse Key and Gagged Skull
Explore the newly opened rooms. In one of them, you can use the code 1923 on an optional cabinet. The route through the room with water leads deeper into the area. Once you reach the collapsed floor, head down and find the Hobby Horse Key beside a body. Be ready for an attack after picking it up, then return upstairs to the door with the matching symbol.Beyond it, enter a large hall and take the Gagged Skull from the pedestal. Another multi-armed enemy will appear on your way back. This time, use your newly learned Hellchains and attack its vulnerable limbs, without lingering in front of its body. Return to Zora, stock up on healing items and ammunition, then open the door bearing a skull.
How to Defeat the Sister of Mercy
The Sister of Mercy hovers in the air and attacks from a distance, so firearms will do most of the work here. Use the pillars to shelter from flying blades, then step out for short, aimed bursts. Don't stand out in the open center trying to deal constant damage. It's better to spend a couple of seconds moving around cover than to end up healing during the next attack.Pay particular attention to the red glow before her rapid charge. You can interrupt this dangerous attack with gunfire, creating an opportunity to use another ability. When the prompt appears, use your Hellchains. You'll need to repeat this during the fight. Shooting alone won't replace the required actions with the box.Alternate between sheltering from blades, shooting the boss, and using chains whenever you get the chance. At the end, perform the Banish action to finish the fight, then collect the heart and valuable items. After that, return to the Labyrinth to see Sunny. Don't miss the Pain Pillar along the main route at the beginning of the next section.
The Sister of Mercy's Heart and Leviathan's Beam
Bring the heart to Sunny's apartment and continue after the cutscene. Leviathan's beam sweeps across the next part of the Labyrinth. Move from one piece of cover to the next, and don't run into an open area until the dangerous phase of the attack has ended. Waiting for the right moment will help more than trying to gain a few extra yards with a sprint.Use the box to reposition blocks, building cover and clearing the route. In the area with a fire mechanism, you can reach the final Suffering Pillar. Use fire to move the right-hand block and reveal a side area. After activating the pillar, return the mechanism to the position needed for the main route. Continue through the Labyrinth until you reach an alley near another of Zora's shops.
Continue Hunting Marlowe - Heart Inset, Bruno, and the Bells
How to Open the Heart Door
In the alley, replenish your supplies at Zora's shop and explore the side rooms. The combination 1362 opens an optional cache containing useful items. Then enter the room with enemies and a central pedestal. Shape the box to fit the mechanism and receive the Heart-Shaped Inset.Return to the door with the matching recess and insert the piece. Move through a warehouse with mannequins and enemies to reach the courtyard. Use flammable and explosive objects so you don't spend all your ammunition clearing tight rooms. You'll find a bell mechanism in the courtyard, but one of its pieces is missing.
Music Box and the Second Bruno Fight
Continue through the shooting range and the section with rotating obstacles. Wait for an opening, slide through the dangerous part, and press the button on the right to stop the mechanism. Farther ahead, drop through the broken floor to reach the music box. Wind it up and collect the missing bell.Bruno appears along the way. Use fire and your shotgun, dodge when he closes in, and avoid standing in hazardous puddles. When the fight shifts into the neighboring area, follow him through the newly opened hole and stick with the same tactics. At the end of the sequence, Bruno steals the Genesis Configuration. You'll have to continue without its help for a while.
Correct Bell Order
Return to the courtyard and install the missing bell. The music box provides a clue to the sequence. Wind it again and listen all the way through if necessary. To solve the puzzle, arrange the symbols from left to right as follows:
Marlowe's bust.
Bruno's mask.
Human torso.
Genesis Configuration.
Group of Cenobites.
Image unavailableThe correct arrangement opens the way forward. Focus on the images themselves. Individual symbols can be described differently, but the bust, mask, torso, box, and group of figures are visually distinct. Now it's time to go after Bruno and the stolen Configuration.
Elevator Key - TV Room and Recovering the Box
In the dark room, wait until the large rotating trap moves to the other side, then cross its path. Check the neighboring room with a cabinet. The combination 8571 comes from the numbers on the televisions. You can also find the last Pain Pillar along the way. Check the passage behind the rotating painting before leaving for the elevator.The Elevator Key is on a table in the room with several televisions, close to the door. Take it, return to the large mechanism, and call the elevator. Armored enemies will attack while it descends. Keep room to retreat and use heavy strikes or firearms against vulnerable areas rather than spending ages hacking at armor with your knife.After going down, head to the room with Bruno and Marlowe. You'll regain the Genesis Configuration after their conversation and the following cutscene. Collect the dropped valuables and save, then follow Marlowe's trail. The route ahead leads through openings and an orange staircase. One of the optional cabinets nearby can be opened with the combination 2342.
Sewers Before the Finale - Electrified Water and Lever
In the large sewer area, use the movable mechanisms against ordinary enemies and make your way to the far side. There's no need to linger over every lone enemy if the route is already clear. You will have to defeat a large multi-armed enemy near the exit, though. Attack its limbs and avoid the bursts of hazardous liquid, leaving yourself room to retreat after its melee attack.After the next descent, you'll encounter electrified water. First, find and flip the power switch, then enter the now-safe section. The two electrical zones are linked. Changing the power on one side makes the other safe. Check which section is currently live before stepping back into the water each time.Near the place where you saw Marlowe, turn off the power and examine the bodies in the water. Flip over the body on the left when facing the opening, and take the lever. Climb back to the mechanism, install the piece, and start the next crossing. Enemies will attack, and you can use the power switches against those entering through the water. Just don't turn on the electricity while you're standing in it. That would be a particularly unfortunate end to an almost completed journey.Once across, continue through the next rooms and descend. In the cave section, remove the wooden cover blocking the route and reach Zora. This is your last chance to shop in peace before Marlowe. Buy healing items, refill shotgun ammunition and supplies for your other main weapons, sell any remaining valuables, and clear unused items from your inventory.
How to Defeat Marlowe - Final Boss
Head toward the church and crawl beneath the rubble to reach the arena. Marlowe can take a lot of punishment, but you don't need to shoot blindly at his enormous body. His weak points are the three human figures on his back. Circle the boss, shoot those targets, and watch him turn. His attacks can knock Aidan down, making it easy to get hit a second time.Once Marlowe is stunned, use Hellchains. They'll expose his main weak point. Switch to the shotgun and deal damage from a suitable distance. Then dodge his attacks again and repeat the cycle of targeting the weak points on his back. Don't empty your entire magazine when the vulnerable area has already closed.The second phase continues the fight in a changed environment. Use the space and obstacles to wait out dangerous attacks, but don't trap yourself in a corner just for cover. Target the figures on his back again, expose him with your chains, and shoot the central weak point. When the option to Banish Marlowe appears, perform the finishing action and collect his heart.
Return to Sunny - The Final Labyrinth
Return to Sunny and give her the last heart. After the story scene, Aidan finds himself in the Labyrinth once again, but this time he can't afford to stop for long. Use telekinesis on the highlighted platform and follow the newly opened route. The floor is collapsing, so we'll save the sightseeing for a more relaxed trip through hell.Pull the two highlighted pieces of rubble into place to form a makeshift staircase. Climb them and continue across the collapsing sections toward the red gates. Watch for usable surfaces. Choosing your next foothold matters more than constantly running straight ahead. After escaping, reach the apartment and watch the closing cutscene.
Final Choice - How to Get Both Endings
At the very end, a passage opens and the Cenobites enter it. The story splits into two endings here: you can follow them or stay where you are. You don't need to collect every note, buy a particular weapon, or finish the game without dying beforehand. The decision is made during the final scene itself.If you want Aidan to remain human, don't enter the passage and wait for the wall to close. If you accept the Cenobites' offer, follow them before the passage closes. After seeing the first ending, return to the menu and load the latest autosave using Continue to make the other choice. You won't have to fight Marlowe again.We've covered Sunny's fate and the meaning of the final scene in a separate guide to all endings in Hellraiser: Revival. Open it after finishing the game if you want to make sense of what happened. That article doesn't try to avoid the major story spoilers.