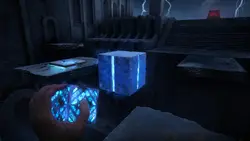
While exploring the Labyrinth in Clive Barker's Hellraiser: Revival, players can find five Suffering Pillars. Each one permanently increases the maximum amount of the special resource consumed by Genesis Configuration abilities, and collecting the full set also unlocks a separate achievement. The difficulty is that the Labyrinth constantly changes. Some pillars are easy to find, while others require rotating several platforms or solving a mechanism beneath Leviathan's beam. This guide explains where to find all five upgrades and how to avoid missing them.
What Suffering Pillars do and whether you can miss them
Suffering Pillars increase your maximum Suffering capacity, the resource used by the Genesis Configuration and shown as a blue gauge in the lower-left corner of the screen. It powers supernatural actions including moving and throwing objects. The larger the available pool, the more freely you can use these abilities in later fights and puzzles. Do not confuse the increase with healing. Health is improved by a different type of artifact.There are five Suffering Pillars and five Pain Pillars in the game. The first type strengthens the Configuration, while the second increases Aidan's maximum Health.And yes, all five pillars are missable. Hellraiser: Revival has no chapter select and does not allow free backtracking into completed story areas. Some Labyrinth passages also close immediately after you move forward. We recommend making a manual save before each new trip into the Labyrinth and checking after every interaction that the upgrade was actually received.For a pillar to count, you must interact with it. Simply seeing the glowing artifact or walking past it is not enough. Wait until the Increase Suffering interaction is completed.
All five Suffering Pillar locations at a glance
We have listed the artifacts in story order. Do not rely on arbitrary chapter numbers from other videos. The current objective is a much more reliable way to identify the correct section.
Pillar 1 - Free Sunny's Soul. Turn left at the red-lit intersection after the corridor with spiked walls and the lowering ceiling.
Pillar 2 - Free Sunny's Soul. Turn around before the arches with two blue lights during the Leviathan and Chatterer section.
Pillar 3 - Give Charlotte's Heart to Sunny. In the Labyrinth after defeating Charlotte, just beyond the save point.
Pillar 4 - Exit the Labyrinth. On the third rotating octagonal section, which requires you to build a route across the platforms.
Pillar 5 - Hunt Marlowe. Behind a movable block in the hall crossed by Leviathan's beam.
Suffering Pillar 1: Red-lit intersection
The first Suffering Pillar appears during the story objective Free Sunny's Soul. This is the first extended visit to the Labyrinth, where the game begins introducing some of its more unpleasant architectural traps. Look for the corridor with spiked walls on both sides and a ceiling that lowers from above. Cross that section and reach the next intersection.At the fork, turn left toward the red glow on the wall. Ahead is a circular area with traps moving counterclockwise around it. The pillar stands beyond them. Watch the obstacles, cross when it is safe, and approach the artifact.Activate Increase Suffering before returning to the main route. This side path is easy to miss because after the lowering-ceiling corridor it is natural to keep running forward. If you have already reached another part of the Labyrinth, check whether the previous intersection is still accessible, but do not assume the game will always let you return.
Suffering Pillar 2: Arches with blue flames
The second pillar appears later during the same Free Sunny's Soul objective. Continue through the Labyrinth until Leviathan becomes visible in the distance and The Chatterer begins appearing around the area. Keep going until you reach a section where arches are visible ahead. This is your landmark, so do not rush through them yet.Stop before the arches and turn around 180 degrees. The pillar is behind you among the ruined structures. Pay particular attention to the arch with two blue lights and golden details. If you are already standing directly beside it, you have gone slightly too far. Backtrack a few steps and inspect the space behind you.Approach the artifact and confirm Increase Suffering. The second pillar is especially easy to overlook because reaching it does not require solving a separate puzzle. The level naturally directs your attention forward while the reward remains behind you. We recommend checking the blue gauge immediately after the interaction before moving on.
Suffering Pillar 3: Labyrinth after defeating Charlotte
The third Suffering Pillar belongs to the story objective Give Charlotte's Heart to Sunny. After defeating Charlotte, you return to the Labyrinth. This time, there is no need to find a secret route through rotating walls. The artifact is almost directly on the main path, although it still requires a separate interaction.Continue forward from the save point. Look for the section with wrecked police cars and steps leading downward. Go down and inspect the area beside the road. The third pillar is located there. Activate it before continuing toward Sunny.Its location directly beside the story route can be misleading. If you simply run through the area, the game does not grant the upgrade automatically. Before leaving this Labyrinth section, make sure the interaction actually occurred. No additional mechanism or item is required for the third pillar.
Suffering Pillar 4: Rotating octagonal platforms
The fourth artifact appears during Exit the Labyrinth, after regaining the Genesis Configuration. Eventually, you reach a room containing rotating octagonal sections. The platforms need to be turned so their passages connect. Do not immediately focus only on reaching the exit because an upgrade is hidden in the same room and requires you to alter the route.The pillar is on the third rotating section. Rotate the second and third sections until they create a continuous path between them. Focus on how the passages line up and do not continue to the next area until you can safely reach the third platform. Once the route is open, cross to the artifact and activate the Suffering increase.This is one of the easiest places for a completionist to make a mistake. You can solve the platform puzzle well enough to progress through the story without ever reaching the pillar itself. If the sections are aligned toward the exit, change their positions and check whether you can reach the third octagon. We cover the moving geometry in more detail in our Hellraiser: Revival puzzle guide.
Suffering Pillar 5: Hall with Leviathan's beam
The final pillar appears near the end of the game during Hunt Marlowe. Look for a large open Labyrinth area that is repeatedly crossed by Leviathan's beam. You need to find the mechanism and complete several actions without lingering under the beam. Make a manual save before entering if possible. Dying in this section can return you to that save rather than a convenient nearby checkpoint.Move toward the front of the open area until you find the source of fire in the center. Use the Genesis Configuration to pick up the flame and send it toward the movable block on the right. Enter the newly opened side area and use the Configuration to raise the block. The fifth Suffering Pillar is behind it. Approach the artifact and activate it.Do not confuse collecting the upgrade with opening the exit. After the pillar, you still need to use the fire again and send it toward the mechanism that opens the way forward. Do this only after activating the collectible. If you focus on the exit first and leave the area, you can accidentally abandon the last pillar. Leviathan's beam remains dangerous throughout the sequence, so do not linger in the open while searching.If everything is done correctly and you activated the previous four artifacts, interacting with the final pillar should unlock Pain and Pleasure, Indivisible. Check the achievement notification and the increased Suffering gauge before leaving the room. That is much better than discovering the missing collectible after finishing the story.
How to unlock Pain and Pleasure, Indivisible
To unlock Pain and Pleasure, Indivisible, you must activate all five Suffering Pillars. They count only after interacting with the artifact, not when you first enter the room. If the first pillar you activate is of either type, Pain or Suffering, you will also receive The Further Regions of Experience. Only one pillar is required for that achievement.Rewards:If the achievement does not appear, think back to two locations first: the arches with blue flames, where you need to turn around, and the third octagonal platform, which is easy to leave unreachable if you only build the route toward the exit. Then check whether you actually activated the fifth pillar behind the raised block rather than only opening the way out. There is no chapter select, so recovering missed upgrades requires an earlier manual save or another playthrough.