In Clive Barker's Hellraiser: Revival, the Labyrinth is not only trying to turn Aidan into another victim of the Cenobites. It also hides useful permanent upgrades. Some of the most valuable are Pain Pillars, which permanently increase the hero's maximum Health. There are five in total, and some are hidden behind traps or puzzles that are easy to run past. This guide covers every Pain Pillar location and explains how to reach each one without missing anything.
What Pain Pillars do and why they are easy to miss
The game contains two different types of pillars. Pain Pillars increase maximum Health, while Suffering Pillars increase the resource used by the Genesis Configuration's abilities. There are five of each, but they are separate collectible upgrades with different achievements.You can recognize the correct object by its stone pedestal with an unusual organic structure on top. Walk up to it and make sure to interact with it because simply finding the pillar is not enough. After the interaction, Aidan's maximum Health bar increases. Activating all five unlocks the There Are No Limits achievement. If this is the first pillar of either type that you activate, you will also unlock The Further Regions of Experience.It is easier to navigate by the current story objective than by chapter numbers. The numbering below reflects the order in which the pillars are encountered, not numbers shown on the artifacts themselves.
All five Pain Pillar locations at a glance
Pain Pillar 1 - behind four moving diamond-shaped traps during Free Sunny's Soul.
Pain Pillar 2 - behind the shifting spike corridor after the Charlotte fight during Give Charlotte's Heart to Sunny.
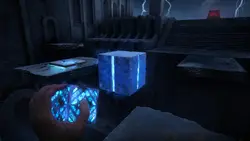
Pain Pillar 3 - in the room with moving staircases and two Labyrinth cubes during Exit the Labyrinth.
Pain Pillar 4 - directly on the main Labyrinth path after defeating the Sister of Mercy.
Pain Pillar 5 - behind the door with rotating picture sections while reclaiming the Genesis Configuration from Bruno.
Story objective: Free Sunny's Soul.The first artifact appears during one of the early visits to the Labyrinth. Follow the corridor with the diamond-shaped trap that rotates and moves from side to side. After passing it, continue to the next intersection. The landmark is a blood-covered opening in the wall. Turn right here instead of continuing along the main route.Ahead is a room containing four more moving traps of the same type, lined up one after another. Do not try to sprint through all of them at once. Watch their positions and move when a gap opens. The required pedestal stands beyond the final trap. Walk up to it and activate Increase Health.This pillar is particularly easy to miss because the side room looks like another dangerous part of the Labyrinth rather than a reward area. If you passed the bloody opening after the first rotating diamond and continued with the story, check whether you can still return before the next transition. Do not rely on the game bringing you back here later.
Pain Pillar 2: Hidden route after the Charlotte fight
Story objective: Give Charlotte's Heart to Sunny.After defeating Charlotte, Aidan returns to the Labyrinth. Follow the route until you reach a corridor where two rows of spikes extend from the walls. Cross the dangerous section and turn left at the next intersection. This path ends in a dead end, but do not leave immediately. At the end of the corridor, you can see part of the Labyrinth structure rotating ahead.That movement opens the route to the pillar. Turn around, go back through the spikes, and now take the path to the right. A passage that was not available before has appeared. Follow it to a small area containing the Pain Pillar and activate the Health upgrade.
Pain Pillar 3: Cube puzzle and moving staircases
Story objective: Exit the Labyrinth.The third Pain Pillar is hidden more carefully than the previous two. After the section with rotating octagonal platforms, climb the ladder and enter a room with moving staircases. Look to the left. Two controllable Labyrinth cubes sit between the platforms. You can see the pillar off to the side, but there is no direct path to it.First, use the Genesis Configuration to align both cubes with the intermediate platforms. One cube moves horizontally and the other vertically. Your goal is to form a continuous route across the gap. Do not try to match decorative patterns on the cubes. Focus on the height of the surfaces Aidan actually needs to walk across.Next, use the staircase route and find the fire-related mechanism in another part of the room. Activate it to change the route and open the way through the reddish wall. Return to the aligned cubes, cross the newly available path, and reach the Health upgrade pedestal. Make sure to interact with it before leaving.If you still cannot reach the pillar, check the two requirements separately. Both cubes must be positioned correctly, and then the fire mechanism must be activated. Building the bridge alone is not enough. Do not confuse this artifact with the Suffering Pillar located in the previous section with the rotating octagonal platforms.
Pain Pillar 4: After defeating the Sister of Mercy
Story objective: Give the Sister of Mercy's Heart to Sunny.The fourth artifact is a welcome break after the more complicated puzzles. Defeat the Sister of Mercy and enter the Labyrinth again. This time, the Pain Pillar is directly on the main path inside a long stone passage lined with arches. You do not need to move any cubes, find hidden switches, or open a side door.The only real danger here is running straight past it out of habit. Watch the walls and alcoves as you move forward. When you see the pedestal, stop and interact with it. This gives you the fourth permanent Health increase. Even if the game has already awarded the Pain Pillar achievement earlier than expected, it is still worth collecting the fifth artifact. Some playthroughs report the trophy triggering early.
Pain Pillar 5: Door with the rotating picture
Story objective: Reclaim the Genesis Configuration from Bruno.The final Pain Pillar appears near the end of the game when the story brings Aidan back to Bruno. During this objective, look for a door covered by an image split into rotating sections. This is its own puzzle. Do not confuse it with the similar mechanism near the well that appears earlier while searching for the statue's tongue.The door shows fragments of several figures. Interact with the movable sections and rotate them until the faces, arms, clothing, and neighboring lines all match. It is easiest to assemble the picture from top to bottom, checking the edge of each correctly positioned section against the next one. If one piece looks correct but the door does not open, inspect the joins. All sections must form one continuous image.Once the picture is restored, the door opens. The fifth Pain Pillar is behind it. Walk up to the pedestal and activate it. If you already collected the previous four upgrades, the There Are No Limits achievement should unlock here. Do not leave just because the door opened. You still need to use the artifact manually for it to count.If you are also opening lockers and safes in the final locations, our separate Hellraiser: Revival lock code guide will help. This particular door does not use a numeric code. You need to restore the picture.
How to unlock There Are No Limits
Simply seeing all five pedestals is not enough. You must activate every Pain Pillar so that Aidan's maximum Health bar increases. Check the result immediately after each interaction, especially for the third and fifth pillars where it is easy to focus on the surrounding puzzle instead. There are no additional requirements tied to difficulty, weapons, or the ending you choose.Rewards:If the achievement does not appear after the fifth artifact, first make sure you did not confuse the two pillar types. Another common situation is finding an earlier pedestal but never completing the Increase Health interaction. Unfortunately, the game does not provide free access to completed Labyrinth sections. You will need an earlier manual save to recheck missed locations if one is still available.