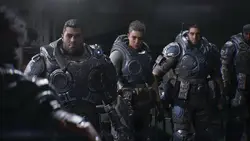

This Gears of War: E-Day walkthrough covers all five campaign Acts, the major puzzles involving bridges, the power plant, and flooding the dry dock, plus the Brumak, Corpser, and final boss fights. We explain the route through every chapter, the main obstacles, and the final sequence so you can quickly continue from wherever you stopped.
How many Acts and chapters are in Gears of War: E-Day?
The main campaign contains 26 numbered chapters spread across 5 Acts. There is also a separate Prologue and Epilogue, bringing the total to 28 campaign sections if you count both. Below, we focus on story progression and the major combat encounters. Every collectible location and Secondary Objective deserves a separate guide.- Act 1 - four chapters.
- Act 2 - five chapters.
- Act 3 - six chapters.
- Act 4 - six chapters.
- Act 5 - five chapters.
Prologue
Follow the tunnel after the first tremors and power failure. Reach the stopped train and continue toward Kalona. This section introduces the campaign, so stay close to your companion and follow the current story objective.Act 1 - the invasion begins
Chapter 1: Emergence
Follow Dom toward the police station. The collapsing street forces you through damaged buildings and service passages. Once you get back outside, clear the approach to the station and enter the building.Chapter 2: Survival of the Fittest
Head to the armory, pick up weapons, and refill your ammunition. Then free the people trapped in the bus and continue toward the recruitment point. The blocked underpass can be bypassed through the truck parked nearby.Chapter 3: A Gear in Need
The distress signal leads to the Pay N Save supermarket. Reach it through the ruined residential area and survive the attack inside the store. After meeting Tai and the survivors, follow the updated objective toward the mayor's group.Chapter 4: Back in the Fold
Escort the mayor's people toward the city administrative complex. Clear the street before the group advances and seal Locust emergence holes with explosives. The final approach leads into your first Brumak encounter.How to beat the first Brumak
This Brumak is not protected by heavy armor, so normal weapons can damage it. Keep your distance and always leave yourself an escape route. Avoid getting stuck on the steps or in a corner where the creature can pin you down.Watch the chains on its arms and move away when it closes the distance. Weapons and ammunition are scattered around the arena, so restock while repositioning. Kill smaller enemies before they block your escape routes.Act 2 - Bravo Squad objectives
Chapter 1: Bravo Squad
At Legacy Bridge, take out the shooters preventing Charlie Squad from advancing. The first control panel jams, forcing you to change route. Climb toward the Skytrain, support the allied troops from above, then descend toward the eastern controls. Lower the central span and finish clearing the area.Chapter 2: Hold the Line
Restock at the stadium before heading into the city. Objectives change as you move through the district, so keep checking the active order. The main sequence is:- Help Charlie Squad at Octus Way Station.
- Investigate the gathering point at All Father's Plaza.
- Complete the Amberstone warehouse section and recover medicine for Mags from her apartment.
- Complete the story objective inside the bank.
- Rendezvous with Charlie Squad to open the route through the camp.
- Continue the search through the next district and reach the Kalona Hotel.
- Defend the signal crew until the relay is operational.
Chapter 3: No Gear Left Behind
Charlie Squad's final signal sends the team east. Descend into the subway and follow the tunnels toward the missing Gears. After the reunion scene, continue along the newly opened route toward the air transport.Chapter 4: Flyboys
During the flight, use the mounted weapon on the Raven. Shift your fire toward positions attacking the helicopter and follow the crew's calls. Keep defending the aircraft until you reach the airfield.Chapter 5: Overrun
After the runway is destroyed, retreat toward the hangar. Fight through the surviving structures toward the western control tower. When the area collapses, use the newly opened path and follow the next evacuation marker.Act 3 - returning to friendly lines
Chapter 1: Stranded
After the crash, move toward Fairlight Outpost. Past the abandoned residential trailers, descend using the rope. The helipad needs power, so restore electricity in the nearby structure and defend the landing zone from the incoming attack.Chapter 2: Enemy Lines
Underground, use the radio inside the crashed Raven. After the squad temporarily splits up, continue toward Cooper Station. Climb through the damaged train cars until the route leads to the Corpser.How to beat the Corpser in the tunnels
During the first phase, use the arena's pillars. Position yourself so the creature's charge crashes into a support, then dodge out of the way at the last moment. Repeat until the Corpser retreats into the next area.In the second arena, your weapons can finally deal direct damage, but collapsing pillars are still useful. Watch the boss's leg attacks and movement, and kill smaller enemies before baiting another charge. We recommend saving heavy ammunition for the phase where it can actually damage the creature.Chapter 3: Last Foothold
Return through the alleys toward the stadium and clear its perimeter. The next objective involves preparing evacuation trucks at Fort Vigil. Reach the hotel, prepare the vehicles, and move on to escorting the convoy.Chapter 4: The Convoy
A raised bridge stops the vehicles. Reach the controls on the upper level and start lowering it. Defend the convoy from above until the crossing is complete, then return to the escort route.Chapter 5: Desperate Times
Advance through the upper floors and rooftops while clearing a route for civilians. Flank the shooters positioned on the tower. Once the street is secure, send the civilians onward toward Fort Vigil.Chapter 6: Desperate Measures
Respond to the order to defend the fort walls and use the mounted weapons. Then pursue the Brumak that breaks through the main entrance and souvenir shop. The breach eventually leads to a firing position overlooking the armed creature.How to beat the armed Brumak at Fort Vigil
From the elevated position, fire at the armor protecting its vulnerable equipment. When you get a clear opportunity, focus on the launcher and mounted machine gun. We recommend destroying one weapon completely before switching to the other so the pressure on the squad gradually decreases.Act 4 - communications and the plant emergency
Chapter 1: Hope and Ruin
Leave Fort Vigil and move through the city. When the direct route is blocked, circle around the district from the east through the cathedral grounds. The far gate leads toward the railway route.Chapter 2: Technical Difficulties
At the platform, wait for the train to Octus Way because the first one serves another line. After boarding, continue forward through the cars. When the rear section begins to collapse, keep moving toward the front of the train.Chapter 3: Tough as Nails
Prospect Bay's communications system needs power. Prepare the available turrets and defend the repair work. Throw the breaker once output reaches at least 85%. Then return to Port Authority and clear the position.Chapter 4: Signals
The squad completes part of the climb by vehicle. After the first fight, take the trail Reyes points out. Continue on foot toward the old weather station and restore contact with command.Chapter 5: Paths Diverge
Reach the Sarahine administrative building through the gate and parking area. Clear the interior and use the public-address system to broadcast the evacuation message. Hold the position until the announcement is complete, then head toward the plant.Chapter 6: Critical Failure
Bypass the blocked crossing through the emergency cooling pipeline. After the staircase collapses, obtain the access card for Zone 5 and continue through the research areas. Reach the enriched-material feed, then the converter. The emergency procedure is interrupted by two large flying creatures.How to survive the converter fight
International guides refer to these enemies as Scoria. You need to kill both before the emergency procedure can continue. Focus your fire on one until it dies, then switch to the second. After the fight, wait for Mags to trigger the story-related tank dump and leave with the squad.Act 5 - evacuating Kalona
Chapter 1: One Problem at a Time
After the train catches fire, jump into the adjacent train and fight your way forward. At the transfer point, choose the train heading back toward Kalona. Use the control lever in the lead car and continue until the next section of track collapses.Chapter 2: Ghost Town
Return to street level and move through the hospital and the sheltered route beneath the tracks. When the path at the fountain ends, go back into the residential building and climb the elevator-shaft cables. Hold the rooftop until the Raven arrives.Chapter 3: Storm Clouds
During the flight, shoot down the Reavers pursuing you. As the Raven descends, shift your fire toward enemies around the Raven's Nest landing zone. Clearing the immediate threats allows the helicopter to land.Chapter 4: Resolute
To get the ship out, you need to flood the dry dock. The main controls are damaged, so the squad switches to the mechanical backup. Z works on the valves while you defend him. After the third mechanism fails, you need to take an alternate route.- Cross the top of the lock toward the hatch on the far side.
- Continue defending the area while Z operates the manual mechanism.
- Use the dock elevator and defend the supports until ordered to return.
- Climb toward the crane, operate the platform controls, and clear the ship.
Chapter 5: The Fall of Kalona
Reach the eastern bridge controls through the lower level. The console briefly works, then fails. Exit through the window and cross the walkway to the opposite side. This starts the first fight with Vraak, also known as the Impaler.After the story transition, continue with the squad. When the direct route is blocked, go through the Skytrain. The detonator lies ahead, where Vraak appears again.How to beat Vraak, the final boss
You can pick up heavy weapons from fallen enemies before the encounter. We recommend using short windows for accurate fire, especially when Vraak turns his attention to a squadmate. Save some heavy ammunition for the second encounter because there is another combat section with regular enemies between the two fights.Move sideways away from his grenades and maintain distance. Use solid cover against the Impaler shot, then return fire during the recovery window. During the second encounter, Vraak closes the distance more aggressively for melee attacks, so change position immediately when he rushes.At the detonator, spend your remaining heavy ammunition whenever you have a safe firing angle. In co-op, use different pieces of cover so a single attack does not force everyone out at once. Once the boss is dead, approach the detonator and activate it.Repeat encounters with large enemies
Brumaks and Corpsers appear more than once during the campaign, so the enemy name alone does not always tell you how the fight works. Against later Brumaks that do not use the same mounted-armor sequence, rely on distance and normal weapon damage. When another Corpser appears, read the arena and active objective before spending heavy ammunition. The exact chapter placement and mandatory mechanics of every repeat encounter are not consistently documented across the guides we checked.Epilogue
Activating the detonator completes the final operation and moves the campaign into the Epilogue. The survivors leave Kalona and head toward Port Ferrell. The story campaign is complete, but finishing it does not automatically mean you collected every item or completed every Secondary Objective.Sign in to leave a comment or rate this post.
Comments
Be the first to comment!