In December 2020, just before the New Year holidays, Genshin Impact received another major update. It introduced the large Dragonspine region, a beautiful snow-covered but extremely dangerous area packed with secrets, an additional quest, and even its own Domain. However, to reach that Domain, you first need to complete the fairly challenging In the Mountains quest. In this guide, we'll explain how to finish the quest, reach the mountain summit, and unlock access to the Peak of Vindagnyr Domain.
How to Reach the Peak of Vindagnyr
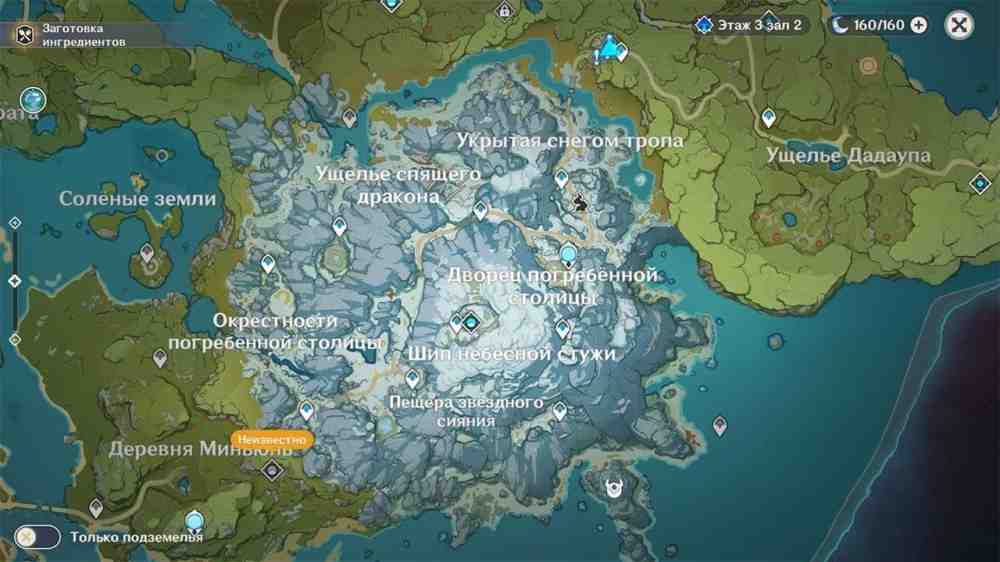
Dragonspine lies southeast of Mondstadt, in the area between Dadaupa Gorge and Mingyun Village, which was previously inaccessible. Now anyone can visit and explore it.Dragonspine Map in Genshin ImpactDragonspine Map in Genshin Impact
Where to Start
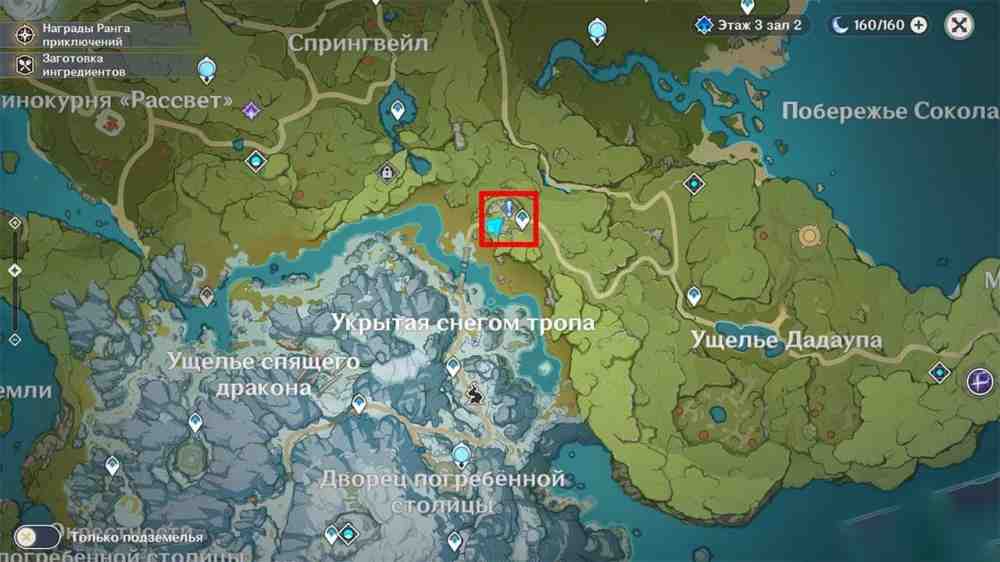
If you are planning to complete the In the Mountains quest, head to the teleport waypoint below Windrise in the Windwail Highland area and speak with the quest NPC Iris. She will warn you about the dangers of the mountains and unlock the quest.Where to Start the In the Mountains Quest in Genshin ImpactWhere to Start the In the Mountains Quest in Genshin Impact
Dragonspine Hazards: Sheer Cold
In addition to powerful monsters, Dragonspine has a unique hazard that constantly complicates both the quest and general exploration of the mountain. It is called Sheer Cold and appears as a blue meter that gradually fills over time. The meter is displayed above your character's HP bar. Once it fills completely, the active character begins taking damage every second. Fortunately, there are several ways to deal with it.
How to Deal with Sheer Cold
Warm up near Teleport Waypoints and Statues of The Seven.
Use your characters' Pyro abilities to light torches.
Activate special warming mechanisms found throughout Dragonspine by approaching them and pressing the interaction key F.
Find Warming Seelie and guide them to their Seelie Courts. This not only unlocks a treasure chest but also creates a permanent source of warmth nearby that reduces Sheer Cold.
Break Scarlet Quartz deposits and pick them up to temporarily stop the Sheer Cold meter from increasing.
What Is Scarlet Quartz?
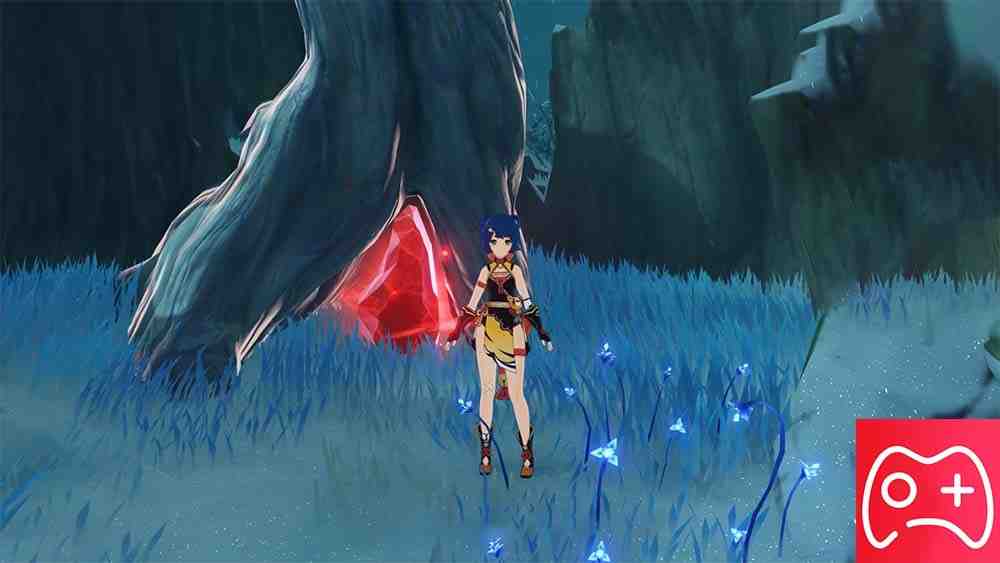
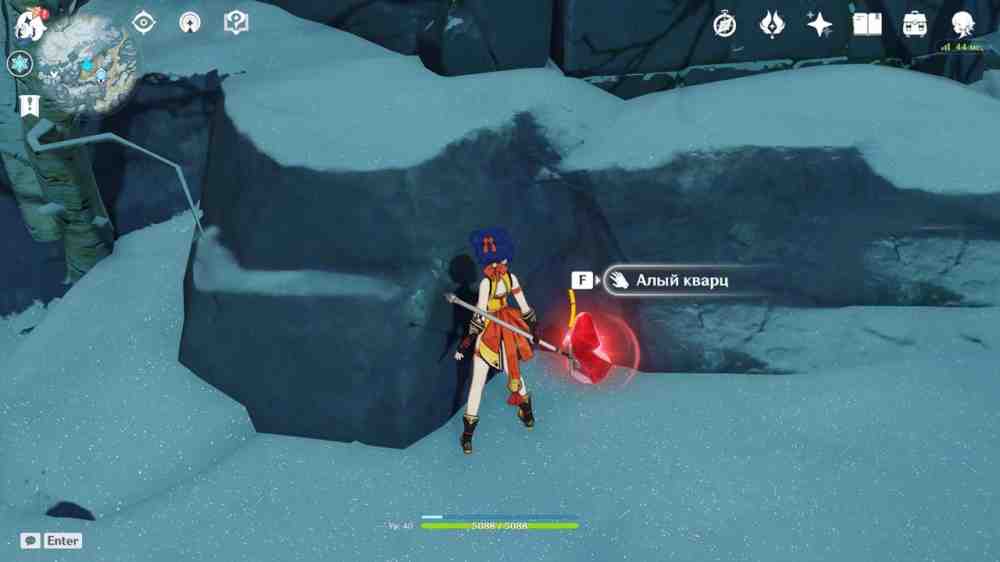
Scarlet Quartz in Dragonspine in Genshin ImpactScarlet Quartz in Dragonspine in Genshin ImpactAround Dragonspine, you can find red mineral deposits called Scarlet Quartz. These have a special function in the region: they allow you to break Ancient Rime and other frozen objects that cannot be destroyed with Pyro abilities. Scarlet Quartz is essential for completing the In the Mountains quest because you need it to destroy the frozen shards, break through ice-covered obstacles, and even unlock access to the Statue of The Seven.
How to Unlock the Statue of The Seven
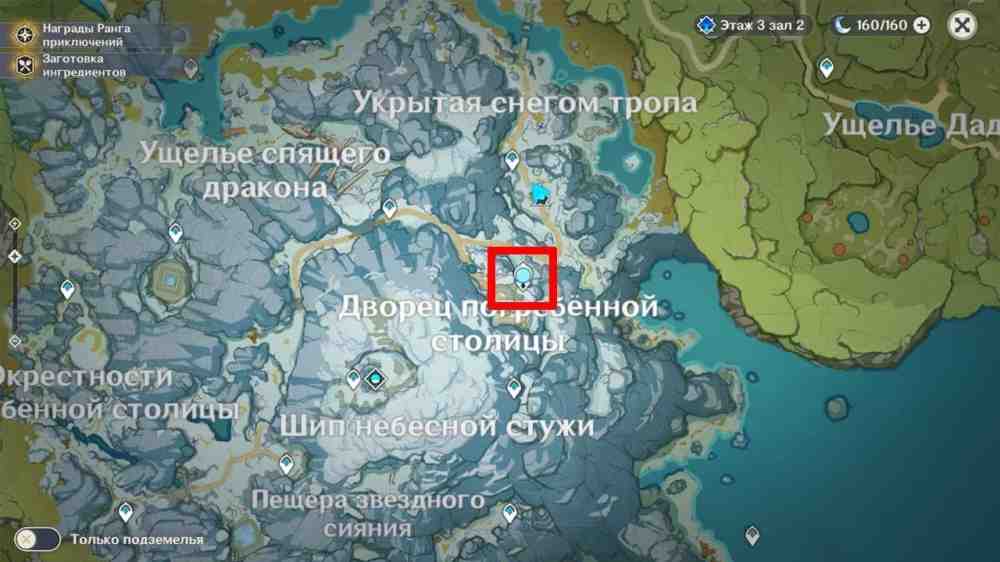
Location of the Statue of The Seven in Genshin ImpactLocation of the Statue of The Seven in Genshin ImpactReach the point marked on the map and find a nearby Scarlet Quartz deposit. Break it, pick up the quartz, and while its effect is active, strike the ice blocking the way to the statue. You can now activate the Statue of The Seven in Dragonspine.
How to Complete In the Mountains and Reach the Peak of Vindagnyr
The best place to begin both the quest and your exploration of Dragonspine is the northern part of the region. From here, you can easily reach the Statue of The Seven and find several interesting puzzles.
Frostbearing Tree: First Shard
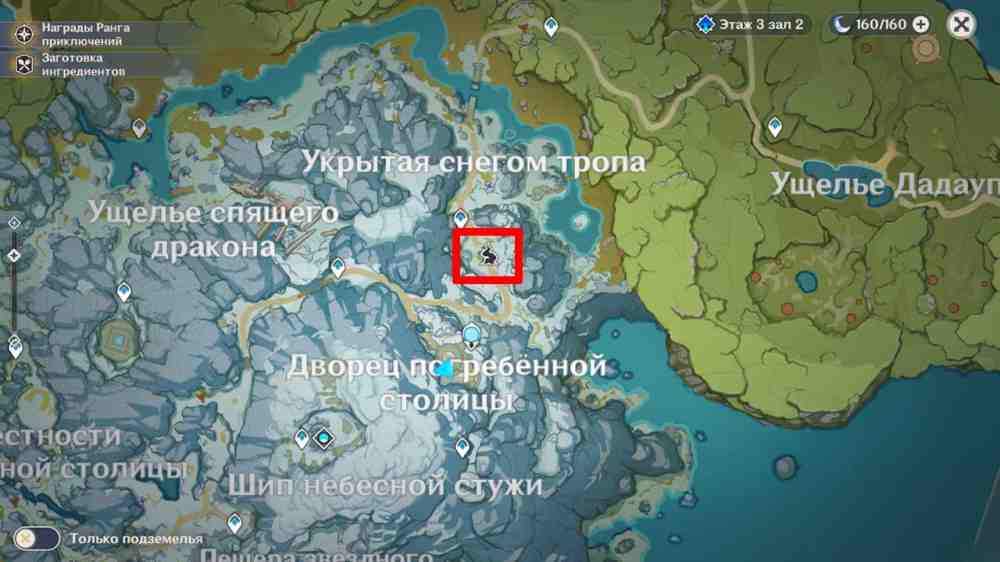
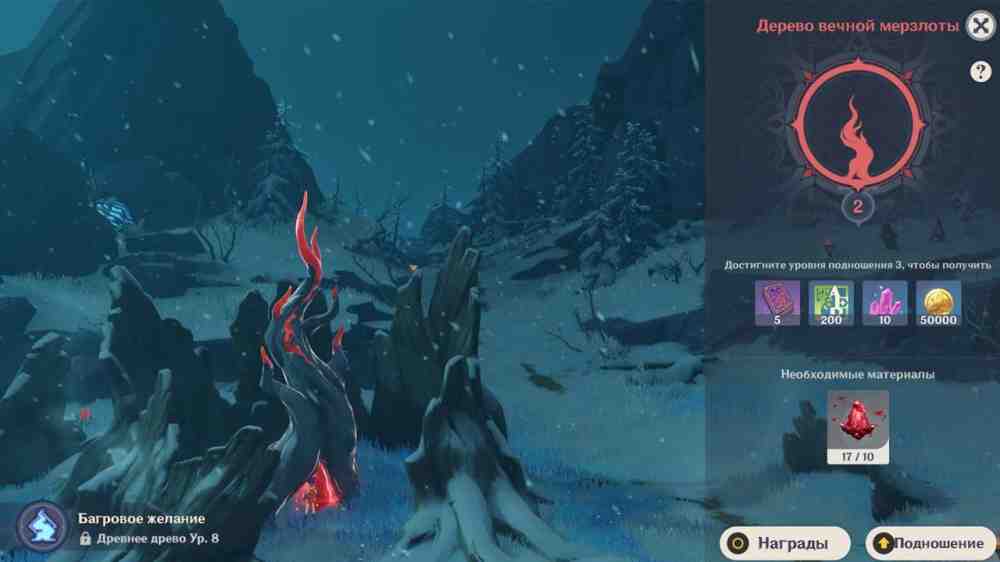
Beginning the In the Mountains Quest in Genshin ImpactBeginning the In the Mountains Quest in Genshin ImpactAfter accepting the quest from Iris, head to the point marked on the map and locate the first frozen shard. A short cutscene will play. To destroy the shard, defeat all nearby enemies, find Scarlet Quartz deposits, and use them to damage the shard. Each Scarlet Quartz can only be used once, so you will need to find another one after every hit. They are scattered nearby and are easy to locate.Once the frozen shard is destroyed, the Frostbearing Tree will appear in its place. As you explore Dragonspine, you will find many Crimson Agates. For every 10 you collect, you can receive a valuable reward by offering the Crimson Agates to the tree and selecting the Offer option.Receive Rewards for Offering Crimson Agates to the Frostbearing TreeReceive Rewards for Offering Crimson Agates to the Frostbearing Tree
Ice Cave Puzzle: Second Shard
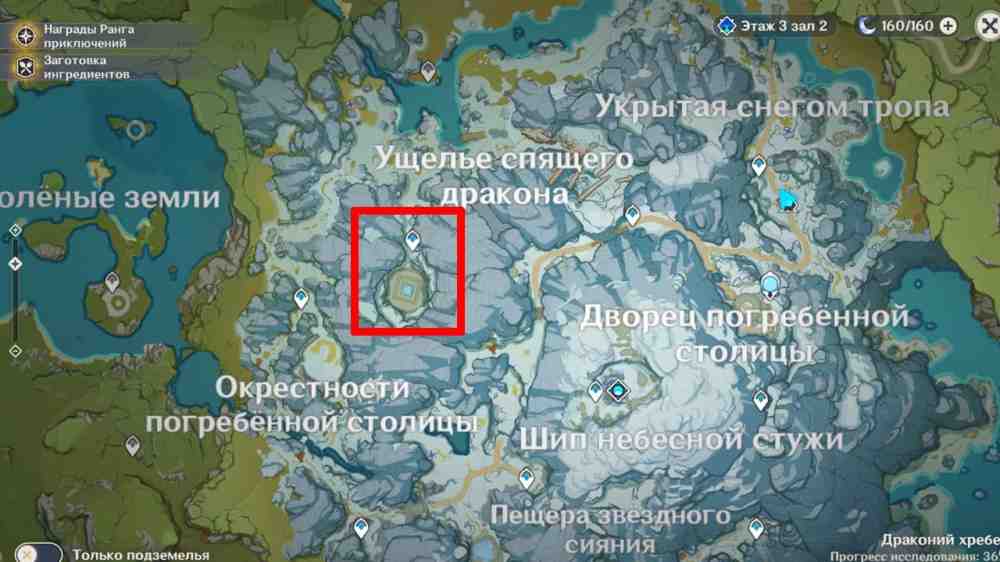
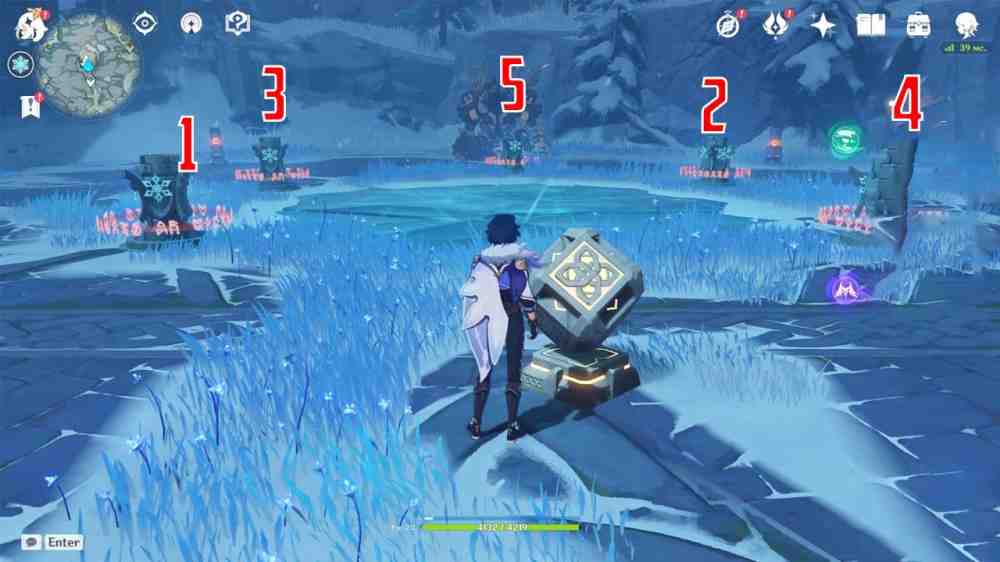
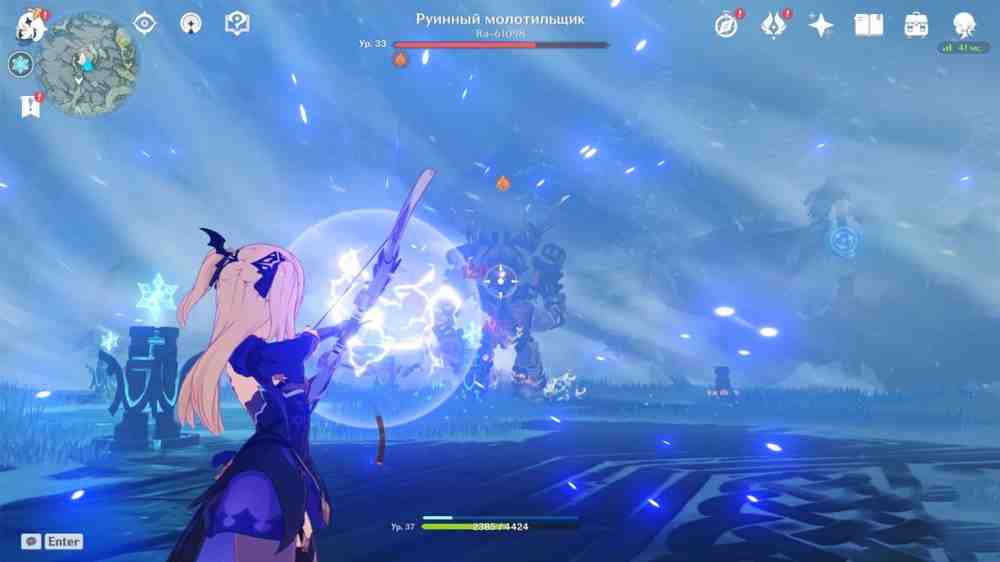
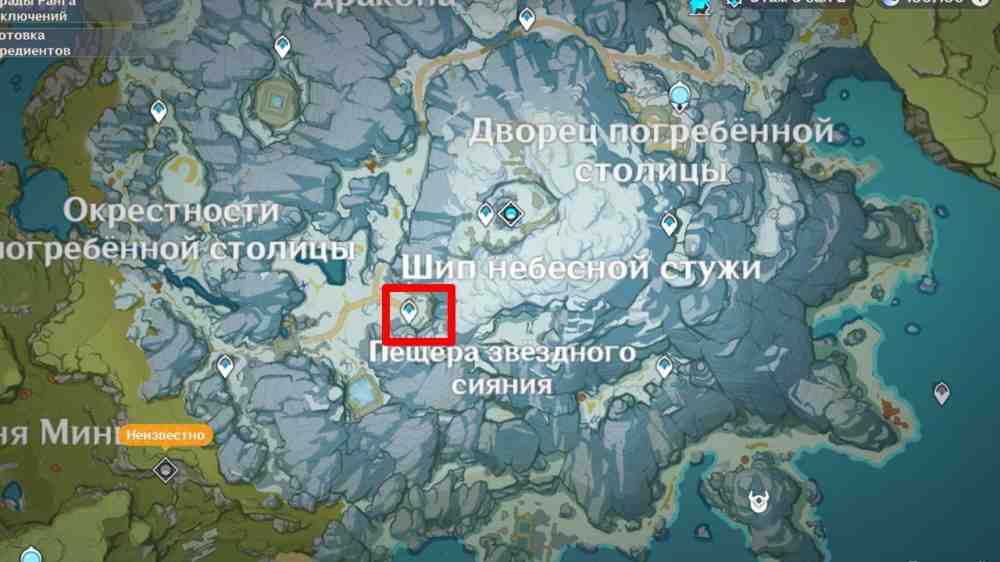
Once you have unlocked the Statue of The Seven, the southern part of Dragonspine will not be useful for this stage of the quest. There are still secrets there, of course, but to progress through In the Mountains, you need to explore the western part of the region.Dragonspine Ice Cave Map in Genshin ImpactDragonspine Ice Cave Map in Genshin ImpactHead to the area marked on the map and use your characters' Pyro abilities to melt the ice around the mechanism and free the Warming Seelie. Activate the platform. The Seelie will move between the Cryo monuments and show you the correct activation order. If you did not memorize it, use the screenshot below. We will update the article later and add a video walkthrough.Correct Order for Activating the Cryo Monuments Near the Ice Cave in Genshin ImpactCorrect Order for Activating the Cryo Monuments Near the Ice Cave in Genshin ImpactFollow the route shown above and use Kaeya's Cryo ability to activate the monuments and awaken the enemies. First, you will need to fight two Ruin Guards, followed by the Ruin Grader. Meanwhile, the warming mechanisms around the arena will activate and shut down in a cycle. It is very easy to forget about Sheer Cold during the fight and die. To make things easier, we have prepared a few tips for fighting the Ruin Guards and the Ruin Grader.How to Defeat the Ruin Grader: Tips
First of all, keep an eye on the warming mechanisms as they switch on counterclockwise.
When fighting the first two enemies, it is best to separate them, keeping one on the right and the other on the left.
Use bow characters against these machines.
Aim for their weak points, which glow when vulnerable. Hitting them allows you to deal critical damage and can even interrupt their attacks.
Enemy Weak Points Glow YellowEnemy Weak Points Glow YellowTip: the first two Ruin Guards did not cause us any serious trouble, but the second boss surprised us. The Ruin Grader has a charging attack that makes it rush quickly toward your character. If you stand near the edge of the arena, the machine can charge toward you and briefly leave the combat area. If you repeat the same mistake, the enemy may disappear and then reappear in its original position with its health fully restored. We are warning you because we made this same mistake twice ourselves.How to Destroy the Frozen ShardOnce all enemies are defeated, the passage into the ice cave beneath the monuments will open. Inside, you will find the second frozen shard, which also needs to be destroyed. Find two Warming Seelie inside the cave:
The first can be found on one of the ice formations.
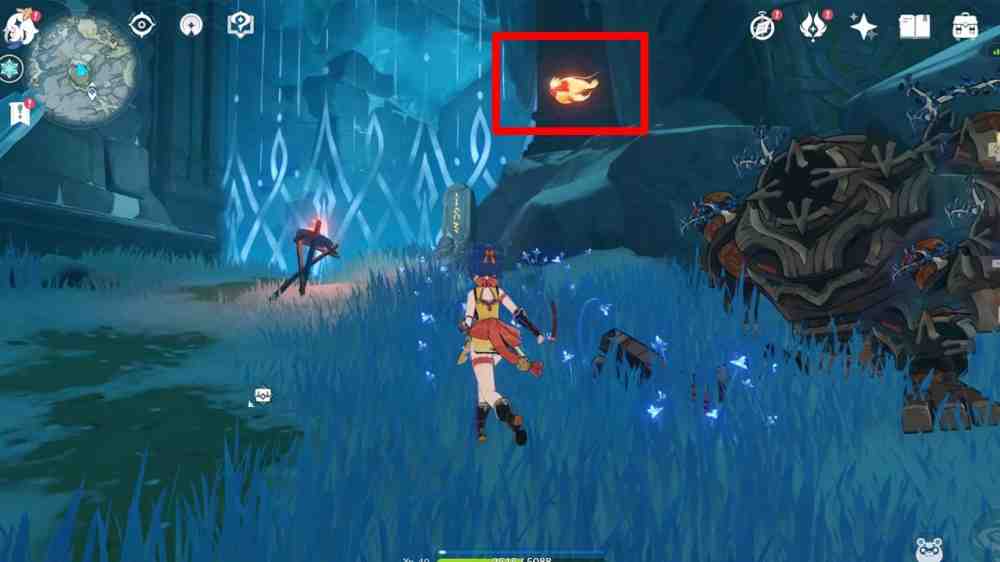
Break the ice near the gravestone to reveal the second Seelie. See the screenshot below.
Break the Ice Near the GravestoneBreak the Ice Near the GravestoneGuide the Seelie to the correct courts and open the locked gate. You can now use three Scarlet Quartz deposits to destroy the frozen shard in the center of the cave.
Challenge at the Bottom of Starglow Cavern: Third Shard
Teleport Waypoint Near Starglow CavernTeleport Waypoint Near Starglow CavernReach the final marked point on the map and activate the Teleport Waypoint. Enter Starglow Cavern and descend to the lowest level. This challenge is quite difficult, so we recommend preparing thoroughly before starting it.The challenge is a large battle divided into four stages. The first enemies are fairly weak, but stronger monsters appear as you progress. To complete the challenge, you must defeat every enemy within the time limit shown on screen. Below are a few tips that should help.
Around the frozen lake, you will see three Seelie Courts where you can guide Warming Seelie. Find all of them. During the battle, these permanent heat sources will keep you warm and save time that would otherwise be spent reducing Sheer Cold.
Use your characters' Pyro abilities, such as Xiangling's, together with Anemo attacks from the Traveler. This lets you spread elemental effects and deal as much damage as possible.
Before the battle, stock up on Frostshield Potions and Flaming Essential Oil. They increase your Pyro damage and reduce the damage you take from Cryo attacks.
Use as Many Pyro Attacks as PossibleUse as Many Pyro Attacks as PossibleAfter completing the challenge, search the lower part of the cavern and find three Scarlet Quartz deposits. Use them to destroy the final shard in the center of the cavern. Once this challenge is complete, Paimon will suggest heading to the summit of Dragonspine. This begins the second stage of the quest.
Restore the Skyfrost Nail at the Summit of Dragonspine
Fast travel to the Statue of The Seven in Dragonspine, which you should have unlocked earlier, and enter the cave. Previously, a powerful current of wind blocked the route, but now that you have destroyed the three main frozen shards, the barrier is gone. Climb as high as possible until you reach the large open area near the summit. This is where the hardest part begins.Now you need to destroy the same three frozen shards, which have somehow appeared at the top of the mountain. Although each now requires only a single hit, you first need to find the Scarlet Quartz required to damage them. Below is a list explaining where to find each piece.
First Scarlet Quartz
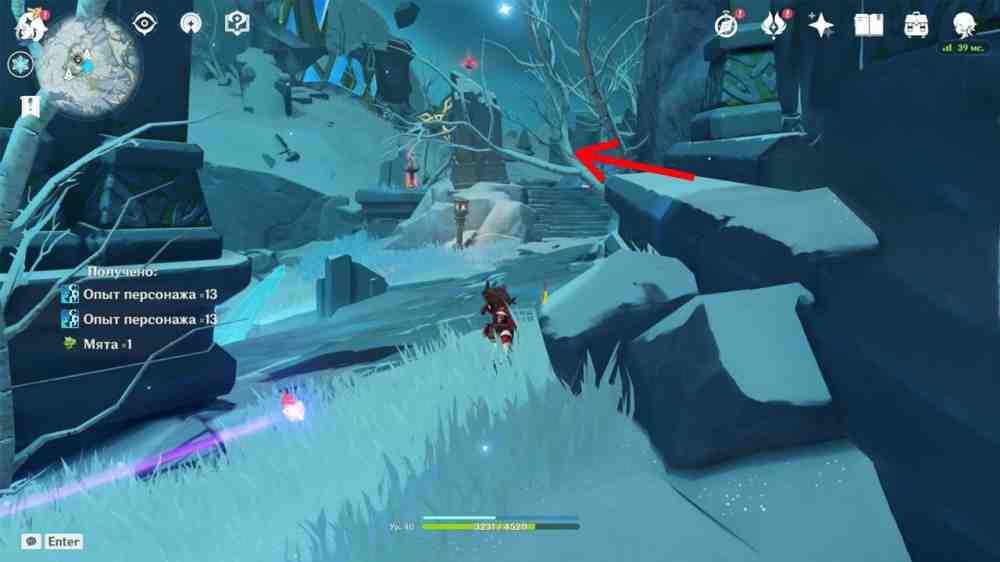
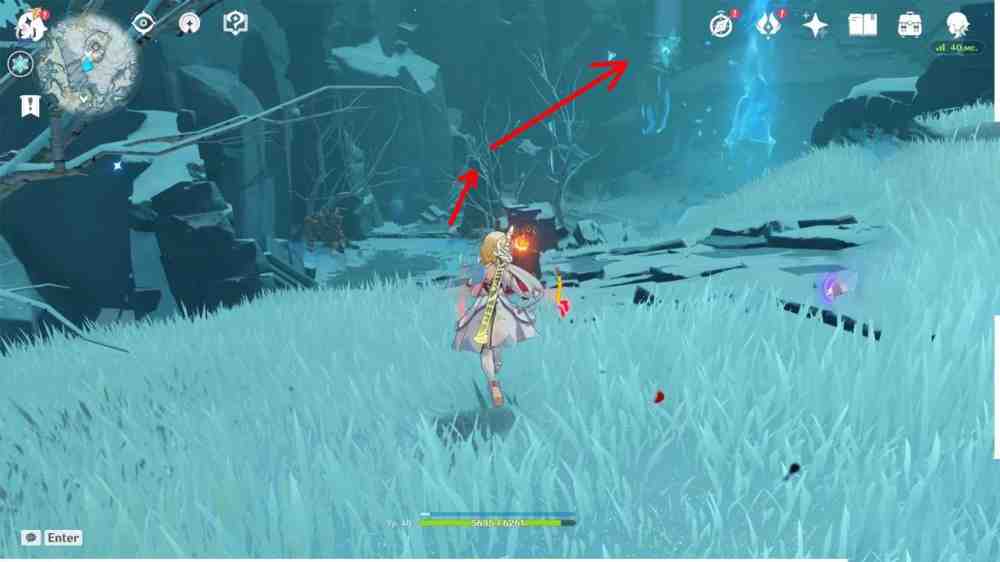
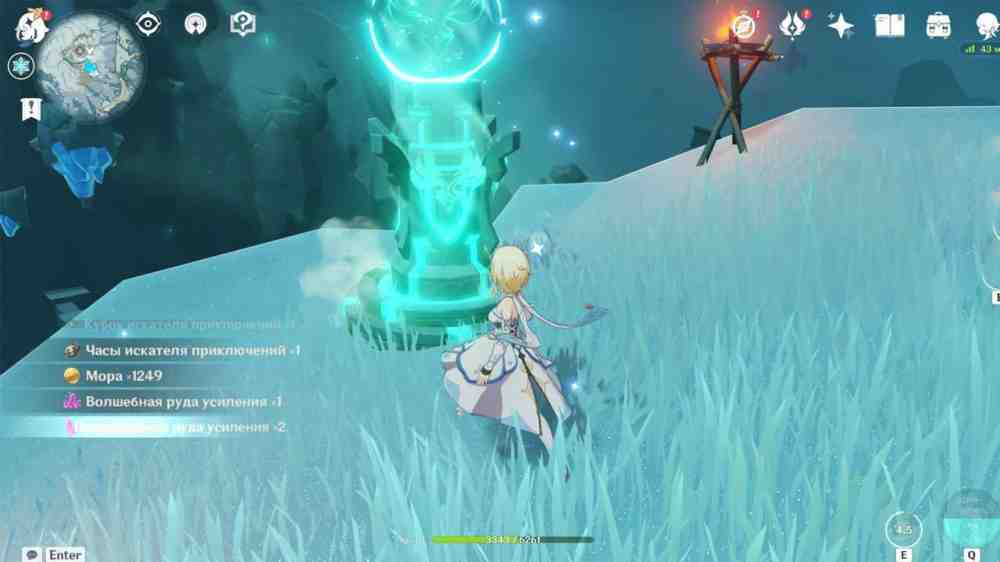
Head Forward and Defeat the Three Flying EnemiesHead Forward and Defeat the Three Flying EnemiesThe first Scarlet Quartz is not far from the cave entrance. Run up the ledge on the right and defeat the three flying enemies. Two appear first, while a third spawns as you approach the quartz. You will need to kill it before you can safely collect the deposit.Once the way is clear, break the Scarlet Quartz and pick it up. Turn around and look toward the Teleport Waypoint. There is a small pillar to the left of it that you need to climb. From there, jump onto the floating rocks, reach the frozen shard, and destroy it.This Ledge Is Easy to ReachThis Ledge Is Easy to Reach
Second Scarlet Quartz
This piece of Scarlet Quartz is hidden slightly higher up. Continue climbing through the cave until you reach an open clearing. Here you will encounter a Frostarm Lawachurl, which you naturally need to defeat. There are no particularly unusual tricks to this fight, but there is one important detail. Make sure to watch the warming mechanisms around the arena. From time to time, the boss uses a freezing attack that not only extinguishes them but also freezes them completely. This may force you to retreat to the previous heat source and, as a result, restart the fight.Regular Enemies Also Spawn During the Boss FightRegular Enemies Also Spawn During the Boss Fight
Third Scarlet Quartz
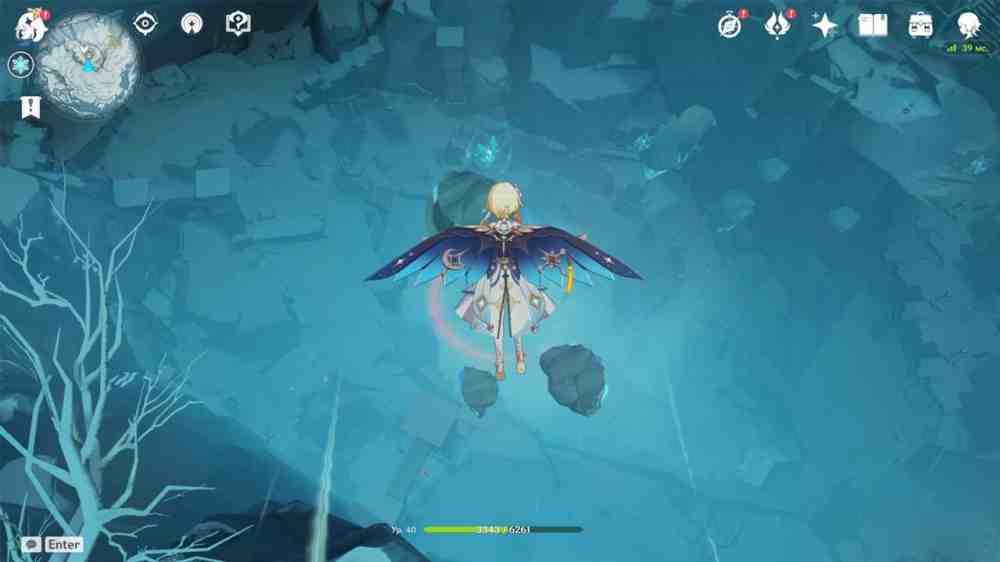
To reach the third Scarlet Quartz, return to the clearing where you fought the boss. In the area where you found the second quartz, you will now find a Warming Seelie. Follow it along the ledges toward the summit, then use an Anemo ability on the corresponding monument.Ride the Wind Currents and Cross to the Other SideRide the Wind Currents and Cross to the Other SideUse the wind rings to glide across to the other side. Defeat the enemies and collect the third Scarlet Quartz. Look over the edge. Below, in the center of the area, you will see the final frozen shard. Glide down to it and destroy it.If You Have Not Destroyed the Second Shard Yet, You Can Also Reach It from HereIf You Have Not Destroyed the Second Shard Yet, You Can Also Reach It from Here
Rewards
Now that you have destroyed all the frozen shards and opened the path to the Peak of Vindagnyr Domain in Dragonspine, you can enter it as many times as you like. However, you still need the appropriate Adventure Rank.Return to Iris to collect your rewards: