
Preparing Coffee
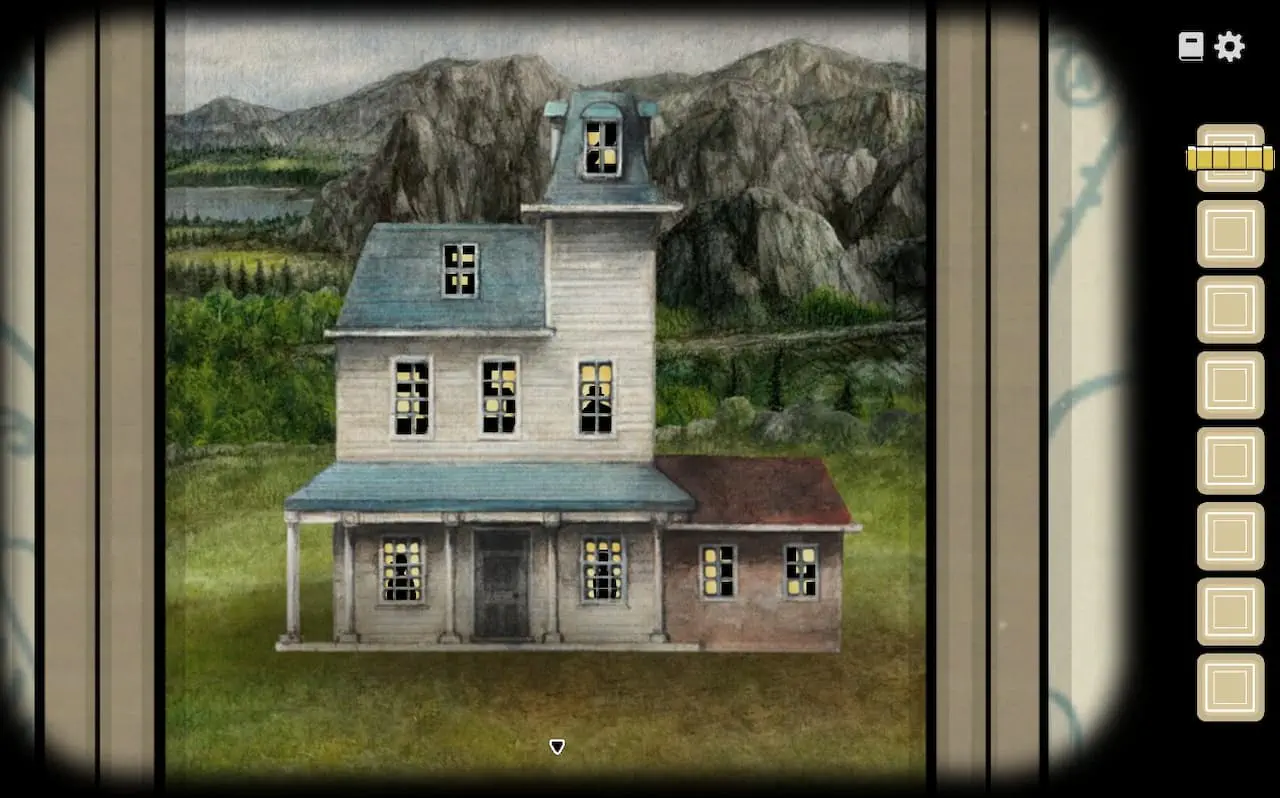
Speak to the maid, then go forward, climb the stairs, and enter the room at the top. Examine the painting of the house and click every window until all the lights are on. The portraits of the family members will reappear in the house. Go back downstairs and check the direction each person points in their portrait:- William, wearing the shorter hat, points left.
- Alexandra points up.
- Aldous, wearing the top hat, points right.
What Is the Code for the Coffee Bean Box?
Aldous is in the bottom-right window. Since his portrait points right, his number is 1. Alexandra is in the bottom-left window and points up, giving 3. William is in the middle window on the right and points left, giving 5. Go to the kitchen and enter 315 on the locked box. Collect the coffee beans from inside.Climb upstairs again and put the coffee beans into the grinder. Turn the handle and collect the ground coffee. Return to the kitchen and add it to the coffee pot on the stove. Take the coffee pot when it's ready. Head upstairs, talk to the maid, and go back down to the door to the right of the stairs. Pour coffee for Aldous. Speak to the maid upstairs one more time, then go through the door on the left.Waking Up William
Pull aside the curtain on the left and take the hat. Examine William's jacket until you find a pocket watch showing 9:00. Pick up the spoon from the table, then set the hands of the grandfather clock to the same time. Near the birdcage on the floor is a small white pile. Inspect it and take the seed from the middle.Look carefully at the family portrait above the sofa.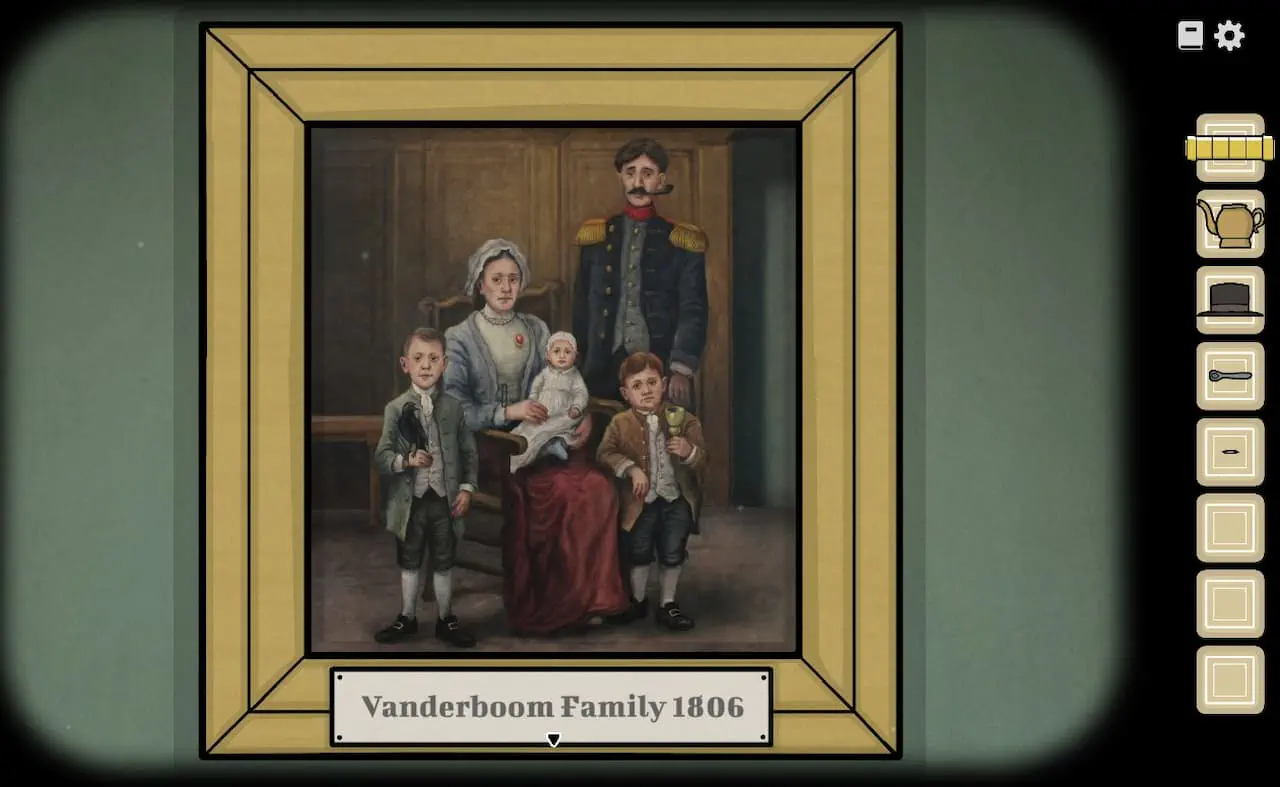
How to Arrange the Objects in the Box Under the Clock
Arrange the objects in the box to match their positions in the family portrait. Put the brooch in the upper-left slot, the pipe in the upper-right, the bird in the lower-left, the stone in the middle, and the bowl in the lower-right. Once they're positioned correctly, click the trembling bowl and collect it.Go to William and interact with him. Click his mouth to make saliva drip out, then hold the cup beneath it to collect the liquid. William's mouth will stay open. Pour the prepared coffee into it.Take the cup to the table beside the bird and pour its contents into the flowerpot. Plant the seed you found earlier. A flower will grow; interact with it to receive birdseed. Feed the seed to the parrot, which will drop a feather. Pick it up.How to Solve William's Toe Puzzle
Use the feather to tickle William's toes. Watch which direction the toe points and how many times it twitches. A toe can point up or down and twitch between one and four times. The direction tells you which way to count, while the number of twitches tells you how many toes to move.For example, if the big toe twitches twice while pointing down, tickle the third toe next. If that one twitches once downward, move to the fourth. If the fourth toe twitches twice upward, tickle the second toe. Continue following the clues until William moves his foot and reveals a small key underneath.Take the key and unlock the box on the table. Inside are a window handle and eye drops. Examine William's face, click his eyes to open them, and put drops into both eyes. William should now wake up. Speak to him and give him his hat.Attach the window handle and open the window. Hold the bowl outside to collect rainwater, then pour it into the flowerpot. Click the new plant to collect another portion of birdseed. Feed the seeds to the parrot again. This time it lays an egg. Give the egg to William and use the spoon to tap it four times until the shell breaks. Back away, then interact with William and the egg in his hands again. He'll eat what's inside. Click William once more.How to Solve William's Scroll Puzzle
Put the scroll on the table and unroll it. You can rotate different parts of the image. Keep turning the sections until they form a complete picture of a fish. When the image is correct, a note slides out. Take it.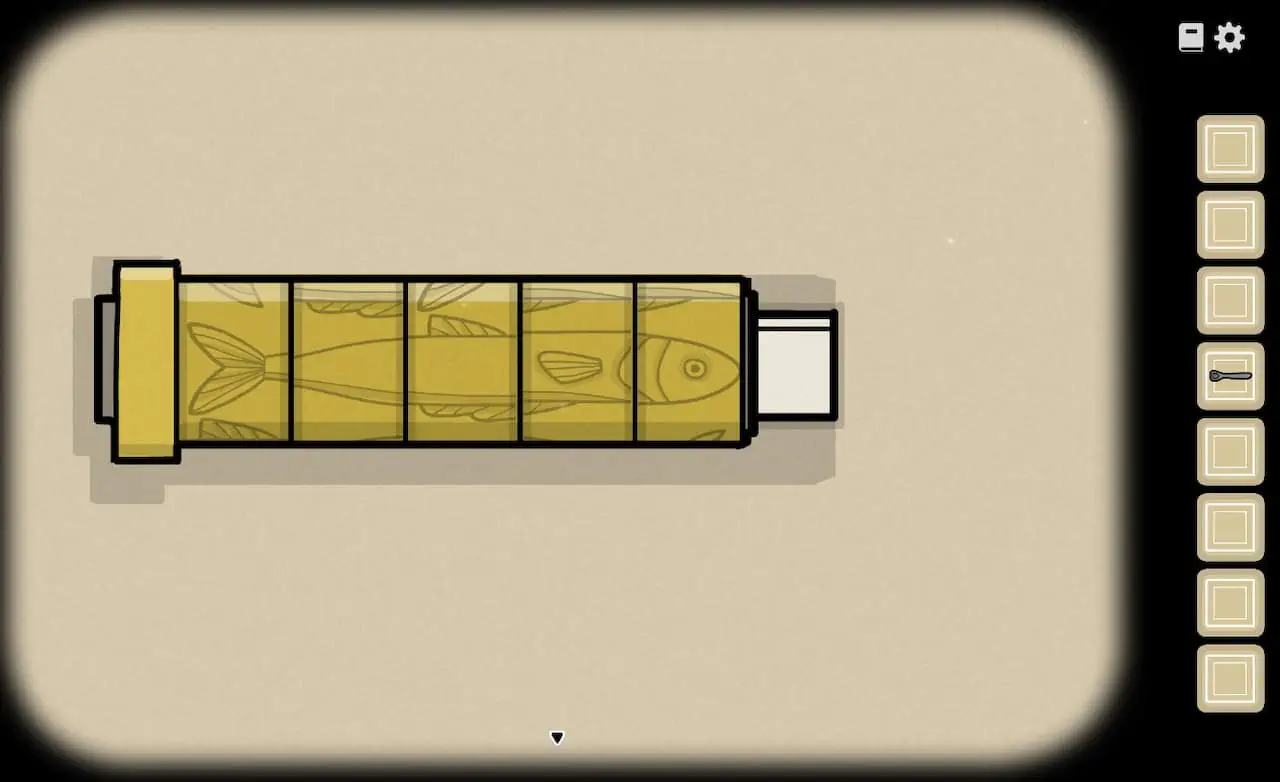
Cleaning the Floors
Head upstairs and talk to the maid. Examine the bag beside her, take the scrubbing brush, and read the note. In the first room, clean the stains according to the number of dots inside them, starting with one dot and progressing to larger numbers.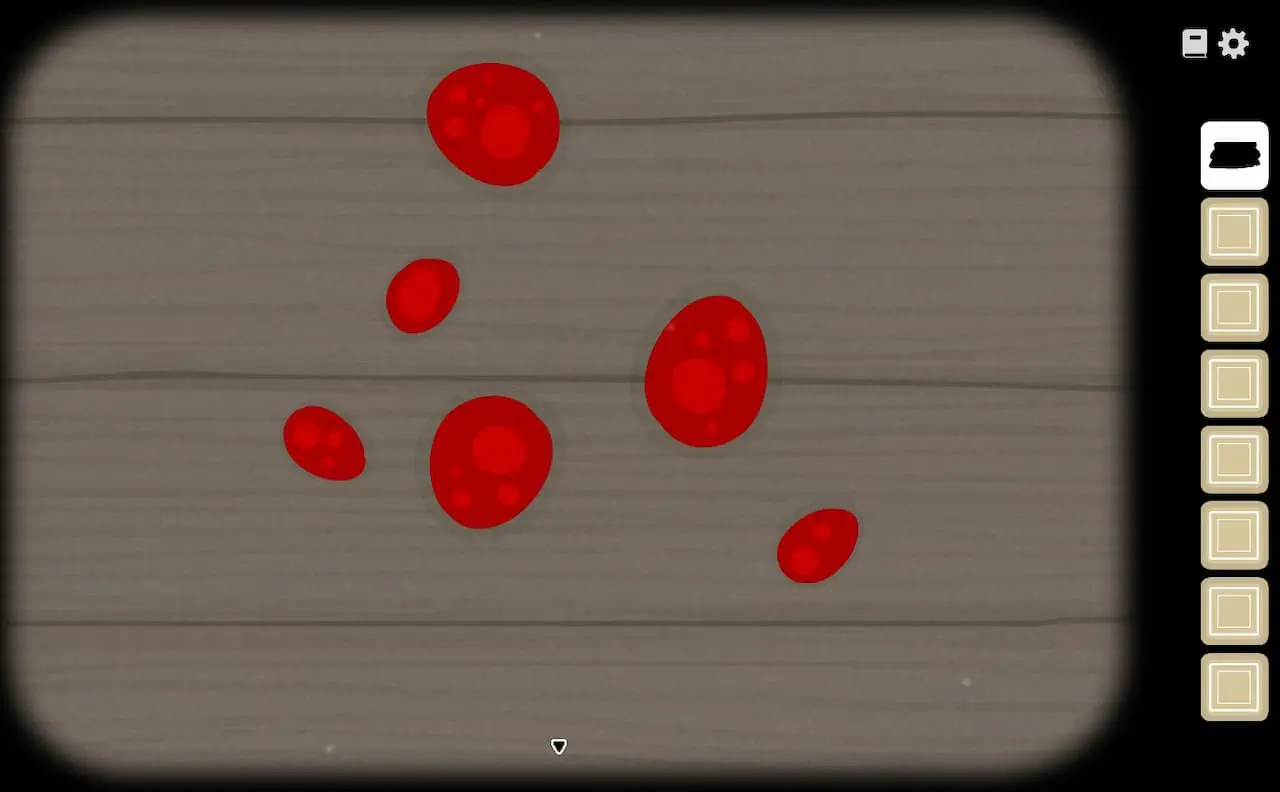
Going Hunting
Pick up the bullets from the tree stump. Examine the hunting list on the table and remember the five clues:- Deer: found beside calmly flowing water.
- Pheasant: searches for food in the treetops.
- Rabbit: digs burrows under stones near corners.
- Pigeon: flies high in the sky.
- Boar: lives near bushes beside the road.
Where to Find Every Animal During the Hunt
Talk to Aldous and take the rifle. Place it on the stump to begin hunting, then move the view to the right. The pheasant sits at the top of the large tree. To the left of the bridge, beside the road, look for a tiny black dot: that's the boar. The pigeon occasionally flies through the sky above the large tree.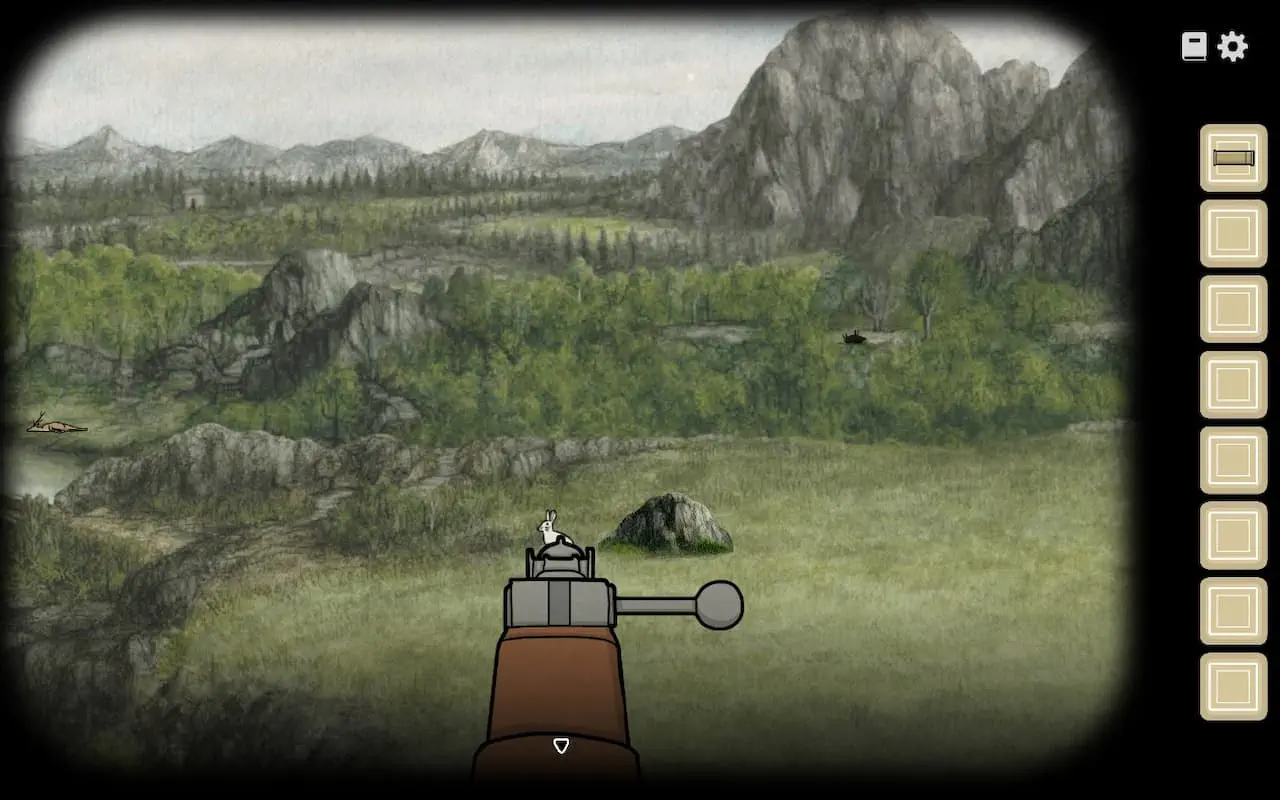
What Is the Shed Door Code?
After the hunt, examine the note on the ground. It says a hunter must train all five senses: sight, smell, touch, taste, and hearing. Talk to Aldous, who's standing beside the meat table, and examine the cuts laid out there. Most have numbers on them, but a few body parts are unmarked. Move those pieces around the table to see which number each responds to. Match the sense organs to the Roman numerals:- Eye, sight: IX = 9.
- Snout, smell: I = 1.
- Claw, touch: II = 2.
- Tongue, taste: VII = 7.
- Ear, hearing: VI = 6.
Doing the Washing
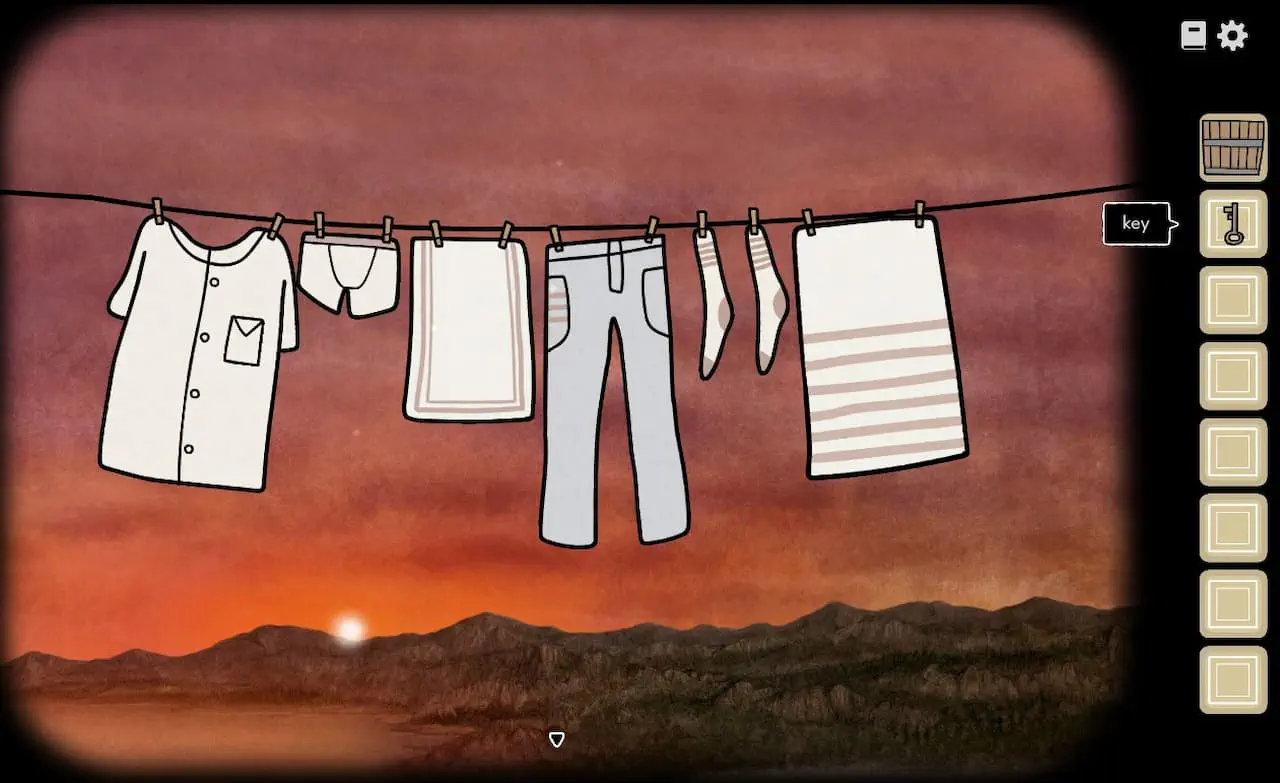
Take the sock from the table and head to the kitchen. Pick up the pile of dirty clothes and the baby, and take the underwear from the table. Put the clothes you've collected into the washing tub on the stove. Go upstairs and speak with the maid. Give her the baby and take the diapers she hands over. Click the guest room door on the left to get another sock.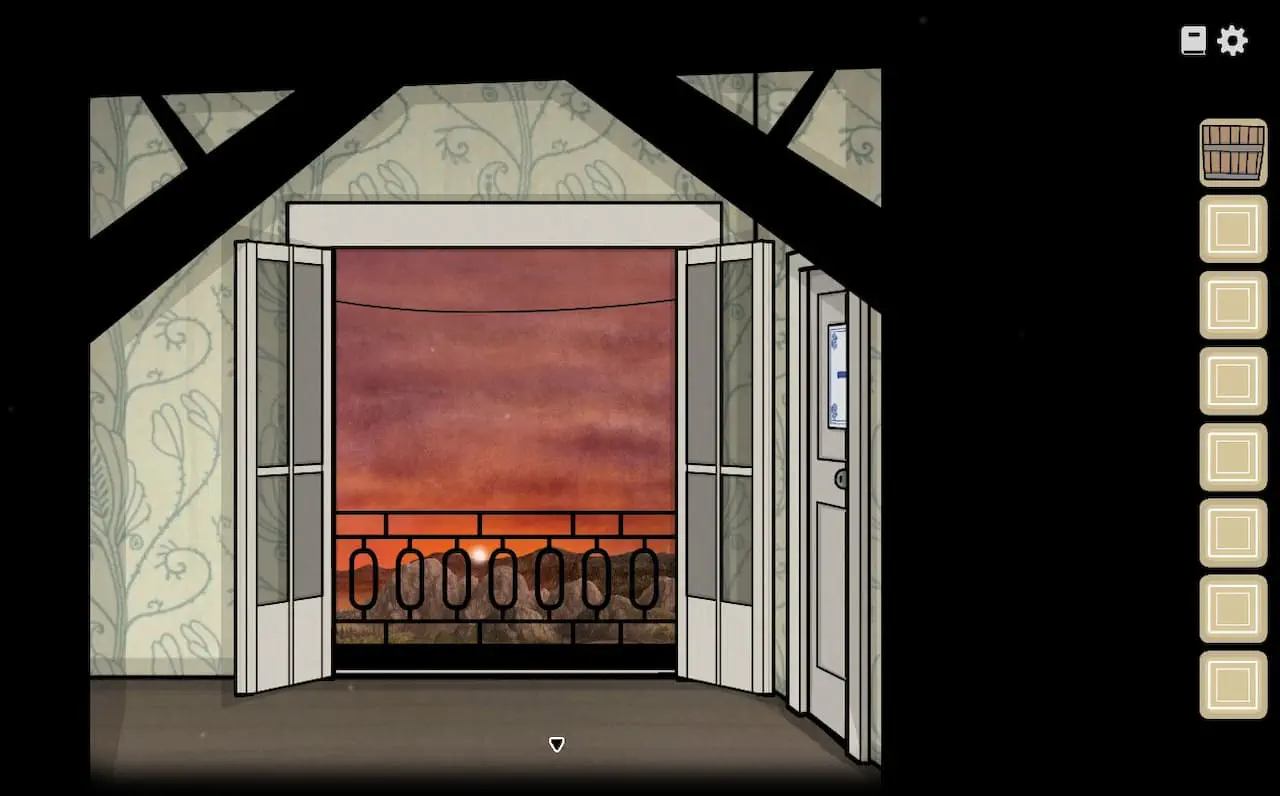
How to Hang the Laundry in the Correct Order
Helping with Bathing
Speak to Alexandra. Pour the water from your tub into the bathtub. On the right side of the room, take the cookie from the plate, then examine the metal box and solve the puzzle on its lid.How to Open the Soap Box
Move the metal tiles until each one matches the illustration on the box. The following steps solve the puzzle. If you've already scrambled the arrangement, closing and reopening the game should reset it:- Move the bottom square tile right.
- Move the round tile right, then down onto the square tile.
- Move the circle with two points (one at the top and one at the bottom) right until it reaches its matching outline.
- Move the circle with four points right.
- Move the plain circle up, then left, then up again until it sits beneath the diamond-shaped tile.
- Move the four-pointed circle left onto its matching outline.
- Move the square tile left.
- Move the round tile down.
- Move the diamond-shaped tile right.
- Move the square tile right, up, then left so that it sits to the right of the four-pointed circle.
- Move the round tile right, then up onto its outline.
- Move the square tile right, then down onto its outline.
- Move the diamond-shaped tile left to finish the puzzle.
How to Solve the Tiles Above the Bathtub
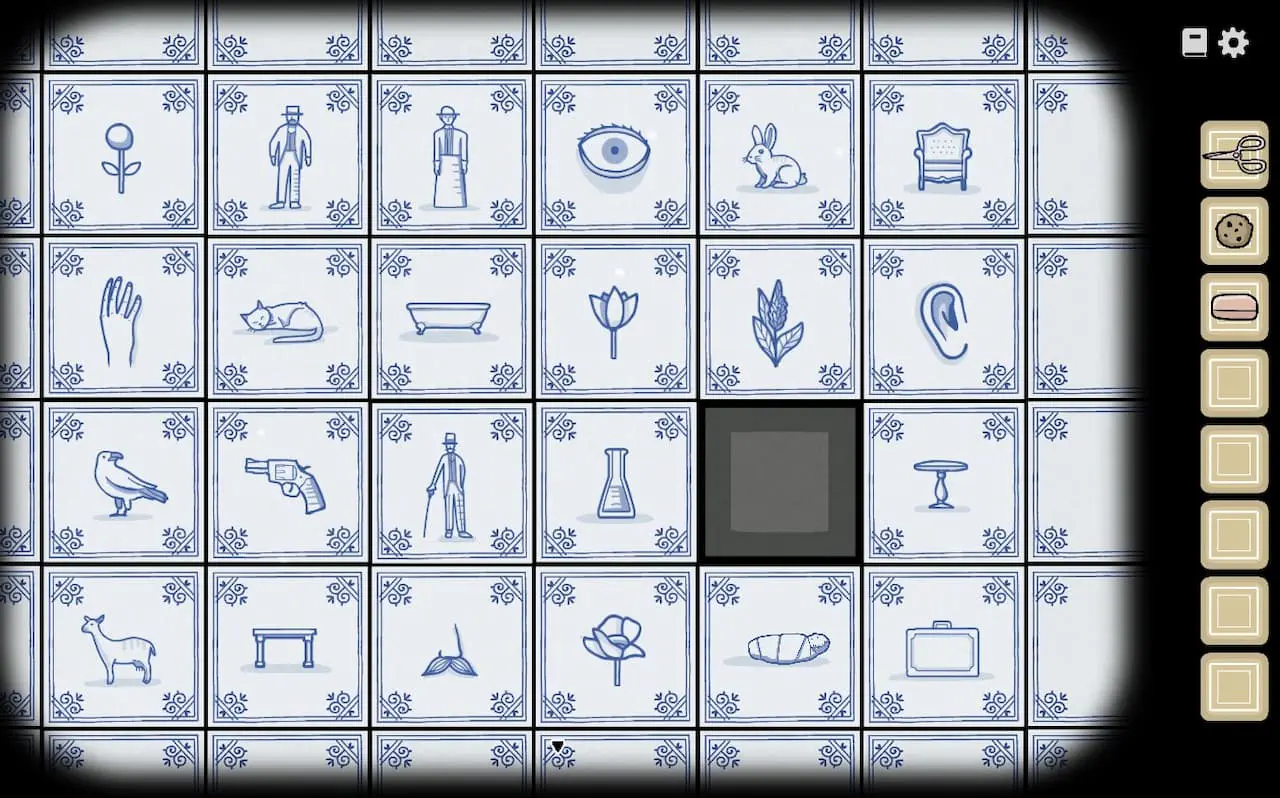
Examine the tiles above the bath. You need to sort them into groups of four pictures sharing a theme. There are six groups in total:- People: two men, one woman, and a baby.
- Flowers: four flower illustrations.
- Body parts: ear, nose, hand, eye.
- Animals: cat, bird, goat, rabbit.
- Furniture: bathtub, table, armchair, small table.
- The remaining objects.
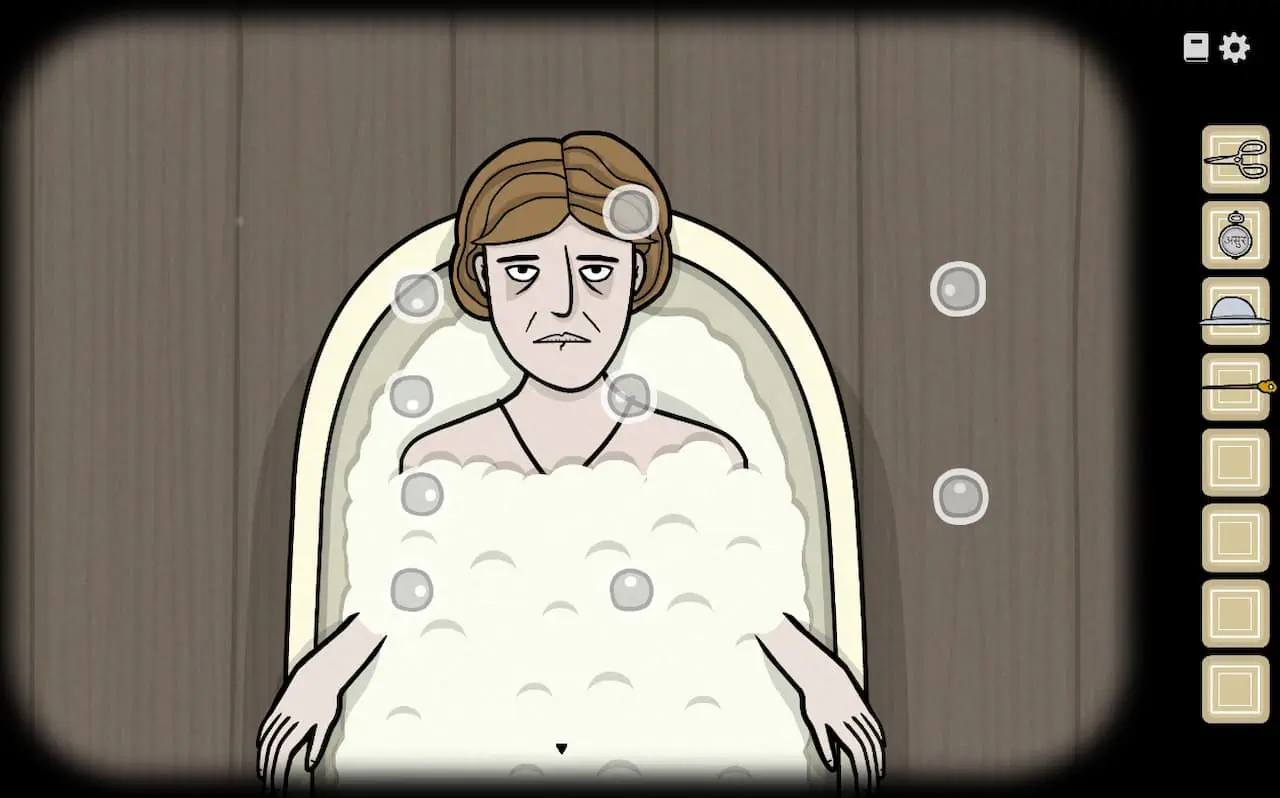
How to Solve the Bubble Puzzle
What Is Alexandra's Suitcase Code?
Lay all the notes on the table. Line them up along their right edges and check where the X marks intersect complete numbers on Alexandra's letters. The remaining digits give you the suitcase code: 281.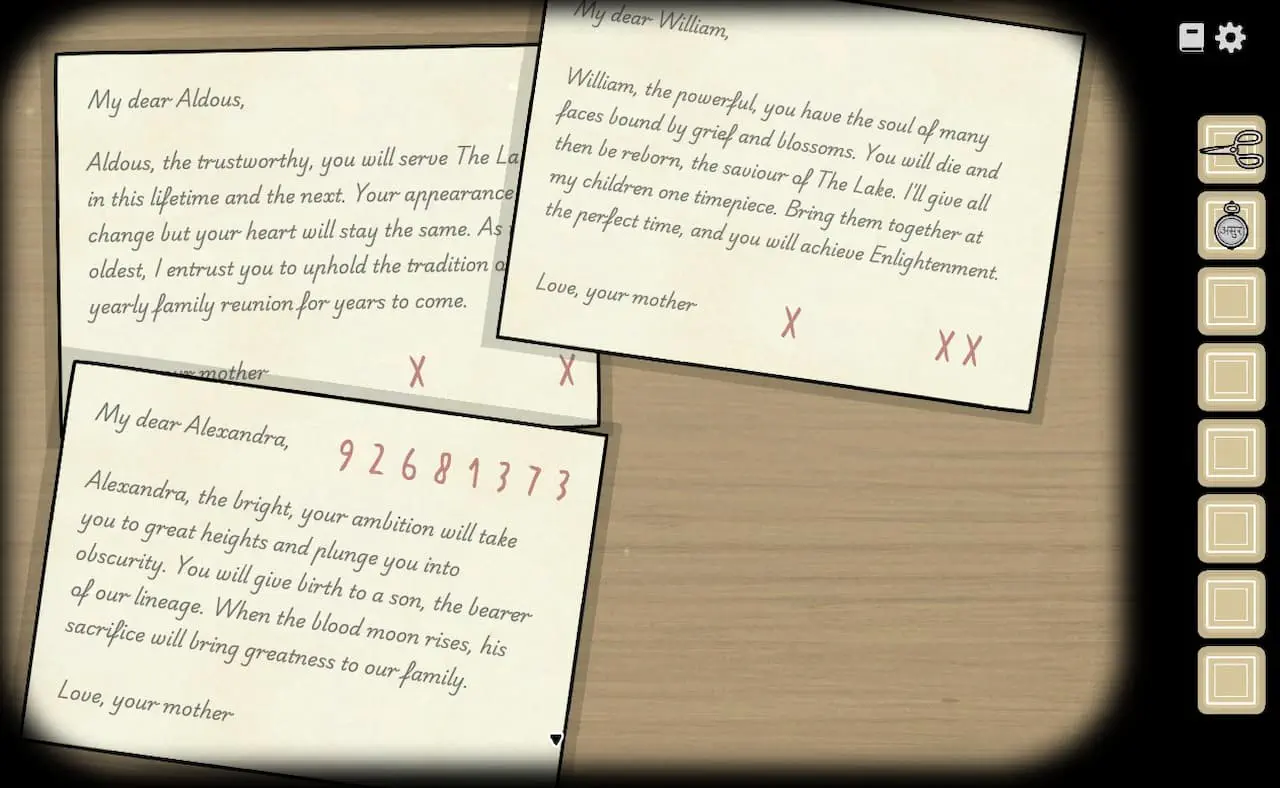
Night Time Duties
Go to the kitchen and speak to William. Take his golden timepiece. You must now examine the three portraits of the siblings hanging in the hallways. Start with Aldous's portrait and drag his silver timepiece onto it. A crow and a triangle crossed by a horizontal line will appear.Next, find Alexandra's portrait. She owns the bronze timepiece. Move it across her picture to reveal an inverted cross and a black face with two white eyes. Finally, use William's golden timepiece on his portrait. An S-shaped symbol and a pair of bloodshot eyes will appear. Return to the hallway with the stairs, lift the rug, and open the trapdoor underneath.How to Arrange the Bottles in the Cellar
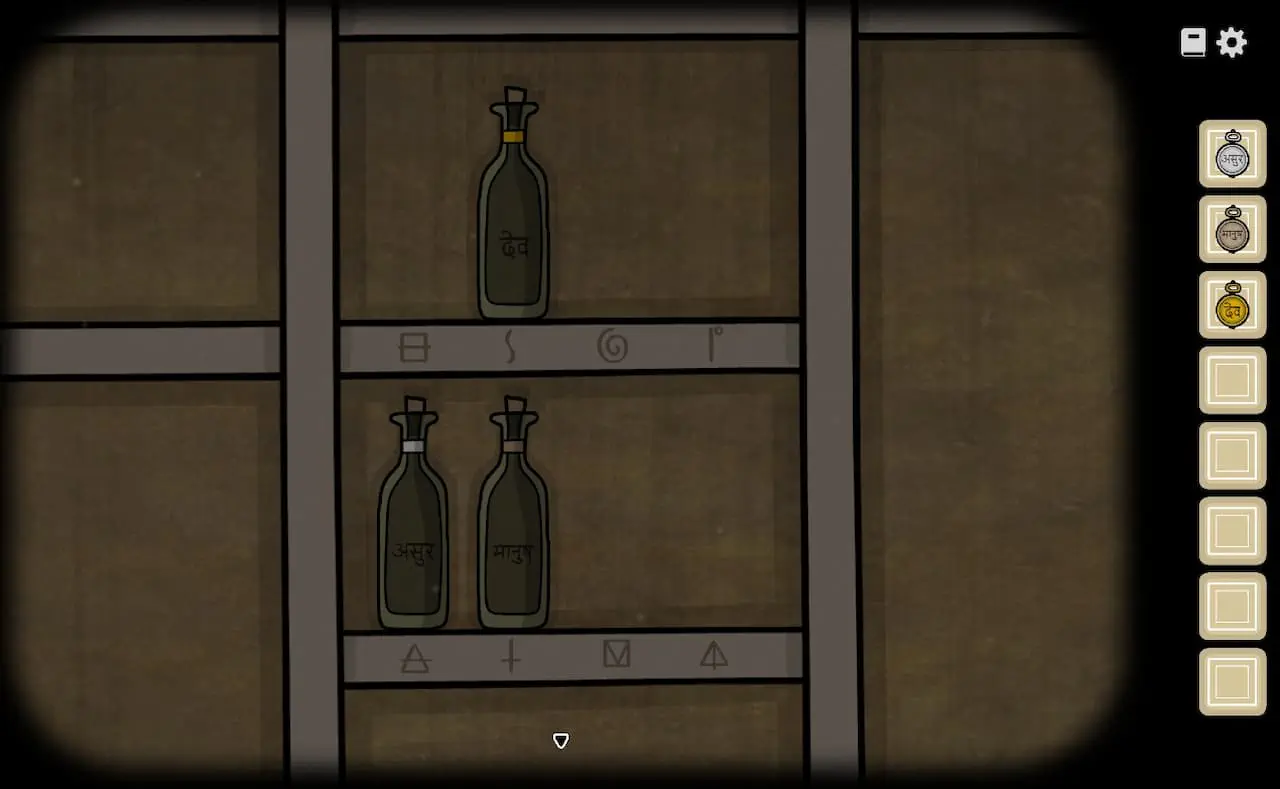
Climb down and examine the shelf. This bottle puzzle uses the colors and symbols you just revealed with the pocket watches:- Place the gold bottle on the S-shaped symbol.
- Place the silver bottle on the triangle with a horizontal line.
- Place the bronze bottle on the inverted cross.
Inspecting the Cellar
Examine the shelf and pick up any three objects. Go through the gate and find the statue holding a clock. Remember the time shown on every similar statue you encounter while exploring the cellar. Click this clock. You'll end up back at the starting point, where you can select a different set of items.How to Get the Torch
This time, take the matches, spade, and magnet from the shelf. Go through the gate, then take the doorway on the left. Use the spade on the pile of dirt on the right to dig up a box. There's also a mouse hole nearby. Use the magnet on it to retrieve a key, unlock the box, and take the torch.Place the torch in the holder on the left and light it with the matches. Go through the doorway on the left and continue straight ahead until you reach another statue with a clock. Examine it and remember the time.How to Blow Up the Barrel and Open the Passage
You'll have to choose three items again. Take the bottle, hammer, and matches this time. Pass through the gate and enter the middle doorway. Hit the barrel twice with the hammer until liquid starts leaking from it. Hold the bottle beneath the hole to fill it, then use a match to ignite the liquid flowing from the barrel. Wait for the explosion.Go through the new opening in the wall. In the next room, pour the liquid from your bottle into the hole in the stone and drop a match inside to cause another explosion. Pass through the second opening and keep going until you reach the next statue with a clock. Examine it and note the time.How to Cross the Broken Floor
For the final route, pick up the hook, lantern, and hammer. Go through the right-hand door. Attach the hook to the rope, then hang the lantern from it. Continue through the passage.What Times Should You Set on the Three Statues?
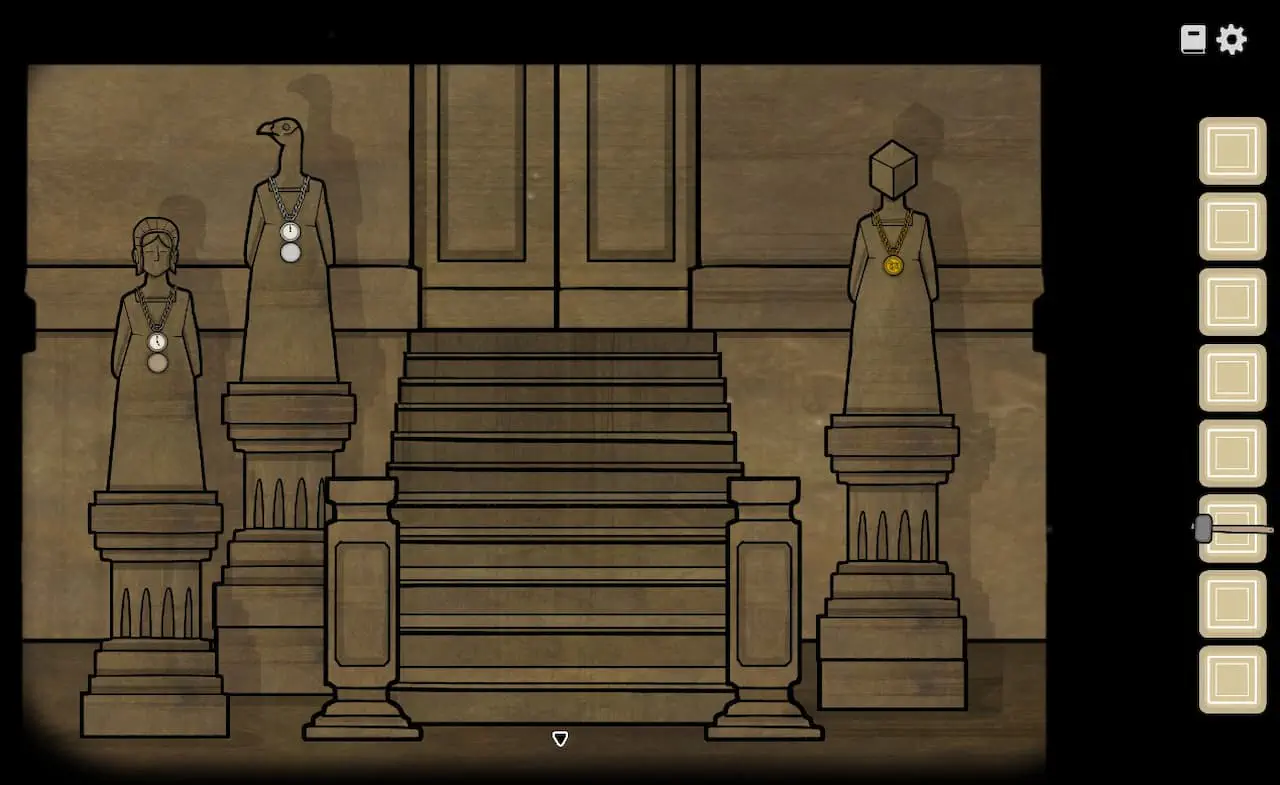
There's a small dent near the bottom of the closest pillar. Strike it several times with the hammer until the pillar falls, creating a bridge across the gap. Go through the next few doorways until you reach a room with a door and three statues.- Place the bronze timepiece on the woman statue and set it to 5:00.
- Place the silver timepiece on the bird statue and set it to 8:00.
- Place the golden timepiece on the statue with a box-shaped head and set it to 10:00.
Sign in to leave a comment or rate this post.
Comments
Be the first to comment!