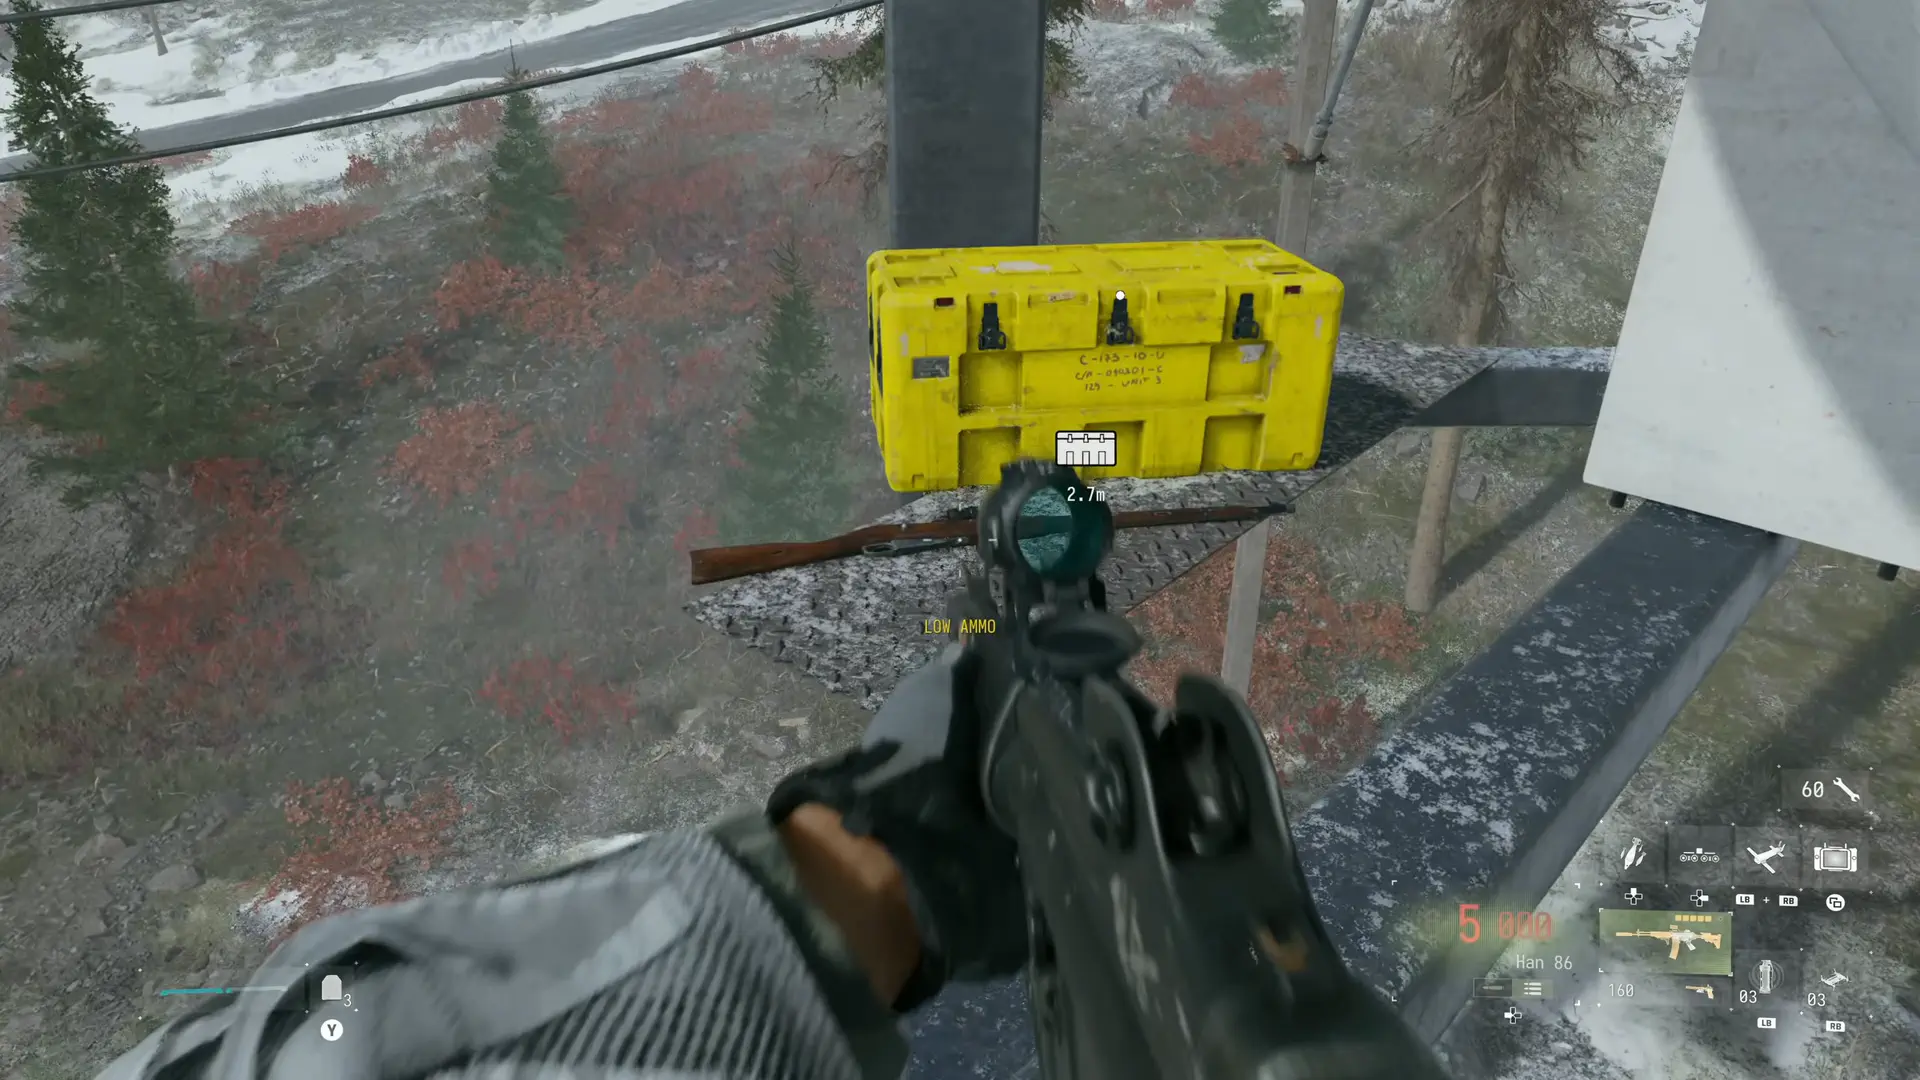
Yellow Supply Crates in Call of Duty: Modern Warfare 4 are hidden at outposts, inside locked containers, in underground stashes, and aboard moving vehicles. Finding them all unlocks the Time to Crate achievement. In this guide, we'll cover all 26 locations in the Stranded mission, including keypad codes, tower climbs, the sewer maze route, and where to find the final crate.
All 26 Yellow Supply Crates are found in Mission 10, Stranded. At Base Camp, talk to Cal and choose to explore on your own and look for supplies. From there, you can collect crates while completing the three story objectives. To unlock the achievement, you must open every crate. Merely visiting its location won't count.Start with the green container near the blue radio tower by the camp. Enter 0024 and examine the map inside. It will help you find the other locked containers. This stash does not count toward the 26/26 total, nor does the bunker in the fields with code 0330. You can find the remaining combinations and explanations of their clues in our Modern Warfare 4 keypad codes guide.The crates below are numbered in route order so you can keep track of what you've found. Use the coordinates to place markers on your tactical map, then check the building or structure when you arrive. A crate may be above road level or underground. Capture outposts along the way. Once cleared, they become fast travel points. If you spot a note nearby, read it while you're there, since documents have their own achievement.
Crates #1-6: Base Camp, sewers, and southern outposts
Crate #1. At the top of the radio tower near Base Camp
Cross the bridge from camp and approach the large blue-and-white radio tower around 644, 158. Climb the ladder to the first platform, then continue along the ledges and pipes marked in red and white. There are supplies on an intermediate platform, but the crate you're after is farther up. Reach the top platform and open it next to the note.Image unavailable
Crate #2. Smuggler's stash in the sewers
Find the blue-and-white Water Treatment Plant building near 639, 165 and descend through the floor hatch using the ladder. Down below, you'll see a crate behind a grate. You can get around it through the narrow pipes on the right, but the passages are trapped. Follow the safe route, starting at the entrance with the painted clue.In the first section, take the first right, then the first left. Keep going straight, take the second left, and reach the ladder. Climb it to enter the second section of the maze. Don't start counting turns from a random intersection. Begin the sequence at the entrance to that section.In the second section, take the first right, the first left, and then another immediate left. Next, take the first right, the first left, and then the second left. Continue to the room behind the grate and climb down to the crate. There's a note nearby. After collecting everything, open the exit from the stash.Image unavailable
Crate #3. Infantry Checkpoint 1
From the Water Treatment Plant, head toward the checkpoint by the river, around 631, 169. Eliminate the guards and enter the guardroom. The crate is inside, beside the window. Check the room before leaving, since you can also pick up a document here.
Crate #4. Island bunker, code 0008
Cross the river to the hidden bunker on the island, near 616, 168. Look for an entrance hatch and keypad rather than the entrance to the large story-related bunker. Enter 0008, open the passage, and head down. The Yellow Supply Crate is in the lower room among the other supplies.Image unavailable
Crate #5. Logistics Station 200 garage
At Logistics Station 200, around 636, 189, clear the enemies and find the green garage building. Enter through the left-hand door. Inside, check the area near the bulletin board and collect the crate. You can then continue toward the artillery position.Image unavailable
Crate #6. Artillery Battery 7
Head to Artillery Battery 7 near 646, 170. After the fight, check the small command post building. The crate is indoors, so you don't have to search every gun emplacement outside. Open it before moving on to the southeastern village.Image unavailable
Crates #7-13: the village, railway, and eastern checkpoints
Crate #7. Container in the southeastern village, code 0078
Look for a shipping container near the village at approximately 652, 187. There's a keypad on its door. Enter 0078, step inside, and interact with the Yellow Supply Crate. You must enter both leading zeros.Image unavailable
Crate #8. Railway water tower
Cross the bridge from the container and find the large water tower beside the railway tracks. Climb the exterior copper pipes and ledges to reach a platform on the structure. The crate is up top, not in the building at its base. This is also a good place to watch the railway and wait for the train carrying the next collectible.Image unavailable
Crate #9. Aboard the moving train
Wait near the tracks for the freight train and climb aboard when it passes close enough. Search the open carriage near the front of the train. You'll find a Yellow Supply Crate there, which you need to open while still on the train. If you miss your chance to jump on, stay near the railway and wait for the train to come around again.
Crate #10. At the entrance to the large bunker
Reach the bunker connected to the story objective involving explosives, around 657, 205. Before heading down, search the entrance area. The crate is beside the entrance, and you don't have to complete the entire operation inside to collect it. If you decide to finish the sabotage objective now, follow our Modern Warfare 4 campaign walkthrough for the next steps.
Crate #11. Logistics Station 10
Continue to Logistics Station 10 around 668, 183. After clearing the area, enter the small guard building behind the tower. The crate is inside by the workstation. Open it and use the newly available fast travel point if you need to return for supplies.
Crate #12. Infantry Checkpoint 2
Follow the road north toward the next checkpoint, near 664, 167. Clear the guards and search the room beside the watchtower. Check near the desk and cabinets. Another stationary supply crate is waiting here.
Crate #13. Infantry Checkpoint 3
The next checkpoint is on the eastern side of the map, below the jamming station, around 672, 141. Look for the crate in the command post building with the Korean sign. Take out the enemies first, then search the room. You'll return here later for a patrol truck. Its crate and the one in this building count separately.
Crates #14-20: the jamming station and stashes north of camp
Crate #14. Jamming station tower platform
Reach the jamming station and head to its main tower, around 671, 121. Climb the first ladder to the exterior platform at the base of the structure. Check the corner of the platform and open the crate. You don't need to reach the very top of the antenna for this collectible.
Crate #15. Logistics Station 20
At Logistics Station 20 near 657, 118, check the guard building after clearing the area. The crate is inside, near the window and desk. Collect it before heading to the containers south of the jamming station. There's also a document in this room.
Crate #16. Container south of the jamming station, code 8609
Head down to the shipping containers around 667, 125. Look for the area near a fuel truck. Enter 8609 on the locked container's keypad and open the crate inside. Don't leave as soon as the door opens. Your counter only increases when you interact with the crate itself.
Crate #17. Bombed-out house, enter through the roof
At approximately 651, 134, find the orange house with a damaged roof and aircraft wreckage on top. The doors are locked, so go around the building and climb onto the roof. Drop through the opening into the house. The crate is in the next room. Check the note near the spot where you drop down, too.
Crate #18. Container on the cliff, code 0600
Return to Base Camp and head north toward the cliff. Climb to the green container on the snowy rise. The damaged wooden ladder can help you reach it. Enter 0600 and collect the crate. Don't confuse this container with the one you opened using code 0024 at the start of the search.
Crate #19. Container by the large road sign, code 1234
Head to the road sign by the river, near 634, 136. There's a locked container beside it. The code is 1234. Open it and collect the crate. If you're also gathering documents, inspect the sign itself, which has another collectible.
Crate #20. Container behind wooden crates
Go to the position around 640, 131 and find the shipping container with its entrance blocked. You must destroy the wooden crates blocking the way with explosives. Throw a grenade or place a charge, move back, and wait for the explosion. Then enter the cleared container and open the Yellow Supply Crate.
Crates #21-26: the island, elevator, truck, and missile site
Crate #21. Container on the river island, code 6789
Find the small island with a container near 618, 132. Cross the water and approach the keypad on the door. Enter 6789, then open the crate inside. This is a separate stash from the island bunker you visited earlier using code 0008.
Crate #22. Logistics Station 100 elevator
At Logistics Station 100, around 616, 141, find the industrial structure with an elevator and broken stairways. Use the generator to position the elevator at the third-floor level. Climb the accessible stairs, move behind the elevator, and enter it through the opening. Continue climbing through the shaft, jump back onto the staircase structure, and reach the upper platform with the crate.Image unavailable
Crate #23. In the back of a patrol truck
Return to Infantry Checkpoint 3 on the eastern side of the map. An enemy truck carrying a Yellow Supply Crate in its bed drives along the nearby roads. Eliminate the accompanying soldiers, climb into the back, and open the crate. We recommend using guns rather than explosives. You need the truck intact until you reach its cargo.
If the vehicle isn't there, fast travel to another outpost and return to Checkpoint 3. Check the road and tactical map. Moving enemy vehicles appear in red. You can also launch a recon drone and inspect the truck bed from above. Don't wait at a single fixed point for this crate. It moves with the vehicle.
Crate #24. Infantry Checkpoint 5
At the northern checkpoint near 622, 121, eliminate the guards and find the green guard building opposite the watchtower. Enter and check near the desk. The crate is inside. From here, continue toward the buildings near the surface-to-air missile site.
Crate #25. Booby-trapped shop
The shop on the hill near 605, 115 is full of tripwires. Activate night vision before entering and inspect the doorway. You can detonate some traps by throwing a grenade from outside, but don't rush deep into the building right after the explosion. Check which wires are still in place. Climb over the counter and follow the right-hand wall toward the rear of the shop, where you'll find the crate.Image unavailable
Crate #26. At the base of the statue at the missile site
Find the large statue at the surface-to-air missile site, around 609, 125. Clear the position and approach the concrete base of the monument. The crate is on the platform beside it. Open it and check your overall counter. If you've followed the full route, it should now read 26/26, unlocking Time to Crate.
What to do if you've found only 25 of the 26 crates
First, check the train, the patrol truck, and the container blocked by wooden crates. Capturing Infantry Checkpoint 3 doesn't mean you've collected the cargo from the truck driving nearby. The same goes for the railway. Climbing the water tower doesn't replace collecting the crate aboard the train. For locked stashes, make sure you opened the Yellow Supply Crate itself, not just the entrance door.If you've acquired the supply locator, equip it and slowly turn in place. Rising readings can help you determine the direction of the remaining collectible. If you get no signal, check the vehicles separately anyway. Some players have reported missing the truck despite the scanner staying silent. A drone makes it easier to search the roads around Checkpoint 3.If the truck is missing, try fast traveling to another outpost and back. This lets you check whether it has appeared again, but there is no guaranteed fix yet for cases where the vehicle disappears. Don't restart the mission until you've checked the other locations and your current counter. You can return to exploration through mission select. When leaving, pay attention to the game's warning about Stranded's separate save.Weapons and equipment inside crates can vary between playthroughs, so track each collectible by location, not by the rifle you receive. Time to Crate requires you to open all 26 crates. Notes are tracked separately. If you want to pick them up during the same route, use our guide to all Modern Warfare 4 notes and hidden stashes.