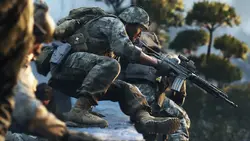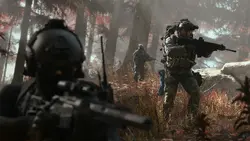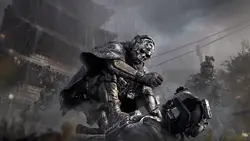

The campaign in Call of Duty: Modern Warfare 4 gets tough fast on Veteran difficulty. Try finishing off one last enemy while your screen is flashing red, for example, and you'll probably find yourself back at the last checkpoint. In this guide, we'll explain how to survive heavy enemy fire, prepare for the open-area missions, and get through the toughest sections, from defending the cafe to storming the reactor.
Recommended Content
More on This Topic
Should You Start on Veteran Difficulty?
If you regularly play Call of Duty on higher difficulties, you can certainly give Veteran a shot on your first playthrough. But if you're just getting to know the Modern Warfare 4 campaign, we recommend starting on Regular. That way, you'll learn how the game switches between combat encounters, stealth sections, and chases. On your next run, you won't have to figure out where to go while dodging bullets at the same time.Keep in mind that Veteran and Realism are two different difficulty settings. Veteran is available from the start, while Realism unlocks after you finish the campaign. You'll need to complete the game on Realism for the separate difficulty achievement. Don't expect to earn it just by beating every mission on Veteran.If you're mainly interested in earning every achievement, it's easier to learn the campaign and collect everything first, then tackle Realism. Veteran is useful for practicing individual firefights, but there's no need to complete an entire extra run on it in between.How to Survive Firefights
One of the biggest mistakes on Veteran is trying to take out everyone in a single peek from cover. You spot two soldiers, kill the first, swing your sights toward the second, and catch a burst of gunfire from the side. Before every move, think about which directions enemies can shoot you from. A doorway with a great view is still a terrible position if it exposes you to the entire room.Stick to the edge of cover and expose yourself to one firing lane at a time. Deal with the closest threat, duck back, recover, and only then check the next angle. If an enemy is still nearby, reload behind a wall rather than in the middle of a doorway. Nobody's handing out an award for a stylish reload here.Before moving into a new area, check a few things:- Your health has recovered. Don't start your next sprint while the screen is still glowing red.
- Your weapon is ready. Reload somewhere safe instead of waiting until your magazine runs dry right in front of a door.
- You know where your next cover is. Pick a specific wall, concrete barrier, or building corner you can reach.
- You have grenades available. A flashbang is much more useful before entering a room full of enemies than after they've already pinned you down inside.
- You've equipped armor where it's available. Mission 14, for example, has armor plates you can pick up. Use them before your next engagement.
Which Weapons and Equipment Should You Use?
For most firefights, an assault rifle with a clear, easy-to-use sight is a reliable choice. Being able to spot a target quickly and control your shots matters more than having a weapon with an impressive name. Fire in short bursts, especially when all you can see is an enemy's head or shoulder.Choose your secondary weapon to suit the mission: a shotgun for tight corridors or a scoped rifle for enemies at longer ranges. Don't swap a dependable weapon you're comfortable with for something that's almost out of ammo just because it looks more intimidating.In Mission 10, it's worth briefly picking up unfamiliar weapons and then switching back to your usual loadout. Weapons and modifications you discover expand the equipment available at camp. Gather supplies and repair your gear before difficult outings. A little preparation here can save you quite a few retries.How to Get Through the Toughest Campaign Sections
Mission 5: Defending the Cafe and Retreating to the Bridge
Don't try to cover every window in the cafe at once. Pick a position where you can quickly duck behind a solid wall and focus on the nearest threats. Watch where your teammates are moving, too. Firing over their shoulders can easily end in a failed attempt because of friendly fire.Once your objective changes to retreating to the bridge, follow your squad. Don't stay in the cafe just to rack up a few more kills. At the mortar position, concentrate your fire on groups of infantry blocking the advance. Save the separate achievement for landing three successful shots for another attempt.Mission 8: Sneaking Out of the Palace
The biggest danger here is rushing ahead as soon as the objective marker moves. Let the guards pass before crossing their patrol routes. In the corridor with the flowers, hide under the table on the right and wait for help. On the outside ledge, stop before the third window and let the enemy inside move past.In the library, crawl through the low opening beneath the shelves and wait out the guards behind the stairs. Use the counters for cover in the kitchen and the hedges in the garden. Entering a code happens in real time, so make sure nobody is searching for you right in front of the door before you start using the keypad.You'll need these combinations during the escape:- 5523 - the library service door.
- 7632 - the kitchen exit.
- 9103 - the bunker behind the statue's base.
Mission 10: Preparing at Camp and Fighting at the Anti-Aircraft Position
Don't rush straight toward the most distant objective. Open nearby caches, collect supplies, and get your camp equipment in working order. You can fast travel between the camp, main objectives, and liberated outposts on this map. That's much more convenient than fighting your way down the same road every time.At the jamming station, stay under a roof when the helicopter is nearby. Don't get dragged into a prolonged firefight in the middle of the exposed plateau. Check the available equipment caches and launch explosive drones from cover.At the anti-aircraft position, make sure you have weapons ready for enemy vehicles. When reinforcements start crossing the bridge, send your drones toward them and place mines along their approach routes before the vehicles get close. It's much safer than waiting for the soldiers to disembark and fighting several fresh groups at once.Mission 12: Machine Guns, the Hotel, and Rooftop Support
As you approach the construction site, mark the machine-gun nests for your allied armored vehicles. This section is designed around their support. Trying to shoot everyone out of fortified positions from a bad angle is an unnecessary risk.Inside the hotel, avoid running into the middle of the lobby. Advance along cover, check elevated positions, and throw flashbangs before shifting to a new firing lane. In the rooms ahead, make sure your target is actually armed before shooting. There are civilians in the conference room.On the roof, divide your targets by weapon type. Use the sniper rifle against infantry and mortar crews, and the mounted rocket launcher against vehicles. When the mortar warning comes in, prioritize the crews. That's not the time to keep casually picking off some distant infantryman.Mission 13: Prison Corridors and the Garage Escape
Price starts this mission unarmed. Peek around corners, use low passages, and stay behind pillars while patrols pass. If a guard is looking your way, wait. Trying to dash those last few feet often costs more than the seconds you would have spent hiding.In the red room with the furnaces, getting spotted is part of the scripted sequence. Don't restart just because you've been detected. Follow the melee prompts and continue toward Ghost.Before the final garage encounter, restock your ammunition in the armory. Your objective inside the garage is the control panel upstairs. First take out the enemies covering the staircase and walkway, then head up. There's no reason to sprint toward the button through crossfire.Mission 14: Trenches, the Armored Vehicle, and the Reactor
You can't sit in the same corner of the trenches forever. Enemies keep spawning until you push forward. Throw a grenade around the next corner, eliminate the closest soldiers, and take your next piece of cover. Restock ammunition and armor inside the bunkers.In the power plant yard, deal with the infantry fighting vehicle first. Supply crates contain anti-armor equipment, including a launcher and explosives. Pick them up from cover and attack the vehicle when enemy infantry aren't putting you under pressure.At the reactor, follow the yellow pipe. It leads to the emergency valve through the flooded passage. Hold the interaction button until the objective updates, then head back along the same route. Passing out on the way back is a scripted story moment, not a reason to restart.Mission 16: The Chase Through the Forest
During the final chase, you can't methodically clear out the entire forest. There may be no visible countdown, but falling too far behind your target causes the mission to fail.Shoot the enemies blocking your route to the target and move from tree to tree. Once you're past a dangerous group, don't turn back for the one soldier you left standing. On subsequent attempts, memorize the shortest route toward the marker and the places where you can briefly take cover from incoming fire.What to Do If You're Stuck at a Checkpoint
After dying the same way several times, stop repeating the exact same sprint. Work out what's actually killing you: a machine gun upstairs, a soldier on your flank, an empty magazine, or an objective that requires you to move forward.Change one thing at a time. Try taking out the flanking soldier first, then peeking from the other side of cover or throwing a grenade before making your run. It's easier to see what works this way than to charge ahead along a completely different route every time.And don't try to combine a high-difficulty playthrough, every collectible, and every combat achievement in one attempt. Get your squad to the next checkpoint first. You can come back for that missing note when you don't have to crawl past three machine guns to reach it.Sign in to leave a comment or rate this post.
Comments
Be the first to comment!