
Contents
- How to find the Sage Sphinx and start the riddles
- Riddle of the Body: Where to find the Mournful Giant and its tusk
- Riddle of the Soul: Where to find Fimbl and the Frozen Wyrmslife Crystal
- Riddle of the Will: Where to find the Decorative Brooch
- All rewards for the Sage Sphinx riddles
- What to do after solving all three riddles
In the Dragon's Dogma 2: Dark Arisen expansion, the Arisen encounters the Sphinx again, but this time the riddles cannot simply be ignored. The mysterious Sage knows how to oppose the immortal Fallen Dragon, but she will only share that knowledge after you complete three trials: the Riddles of the Body, Soul, and Will. To solve them, you need to obtain a giant's tusk, a frozen crystal of dragon blood, and a Decorative Brooch. This guide explains where to find all three items, how to defeat the enemies tied to them, and which rewards you can receive.
Recommended Content
More on This Topic
How to find the Sage Sphinx and start the riddles
The Sphinx appears in the new Norgan region during the Forsaken Dominion storyline. After the first encounter with the Fallen Dragon, the party realizes that ordinary methods will not be enough to defeat it. The search for an answer leads to the Seeking the Sage quest and then to the Sage's Wisdom trials. Do not confuse these with the ten Sphinx riddles from the base Dragon's Dogma 2 campaign. Dark Arisen introduces three completely new requirements.Start by speaking with Dorin in the Norgandian Settlement. He tells you about the Sage and directs you toward the watchtower, where a Spirit Compass is hidden on the upper platform. Follow the bridge to the tower, climb the ladder, and open the chest. Speak with Dorin again afterward. He explains why the normal route will not work and gives you a tool for getting past the obstacle.From there, follow the yellow arrow on the compass. The route crosses snowy territory and the Beorcan Stronghold before leading to the Cavern of Faith. Pass all the way through the cave, turn right after exiting, and follow the trail uphill toward the Shrine of Wisdom. There is a permanent Portcrystal nearby that is worth remembering because you will need to return several times for answers and rewards.The Sphinx presents all three riddles at once. You can solve them in any order, but for convenience we recommend starting with the Riddle of the Body, continuing with the Riddle of the Soul, and leaving the Riddle of the Will for last. There are no dialogue answers to guess. Each trial is only completed after you bring the required item back to the Sage.Before leaving, bring healing items and Heatstones. Two of the quests lead to powerful enemies in the middle of a blizzard that makes navigation harder and limits the party's effectiveness. If you want additional hints, speak with Polyeidus and other residents of the Norgandian Settlement, although the routes below make long conversations unnecessary.Riddle of the Body: Where to find the Mournful Giant and its tusk
For the first riddle, the Sphinx speaks of a giant that does not feel its own pain and suggests greeting the dawn in the place where rest is easiest to find. The clue points to the inn in the Norgandian Settlement, not some hidden cave. You need to trigger a specific event there before the target appears on the map.How to find the giant
Return to the settlement and speak with the innkeeper, Dwayne, until he mentions the giant. Then rent a room and rest until morning. After waking, you will hear a loud roar and see a short scene showing the creature wandering north of the village. You can now go after it. There is no point searching for the correct monster at random before this event triggers.Follow the new marker and continue along the mountain road. Near the entrance to the Nival Gorge Collapse, you will meet Dorin. He points out where the creature went and helps with supplies for the fight ahead. The route then climbs into a severe blizzard. Stay close to the left rock wall. The giant can trigger an avalanche, and standing out in the open makes it much easier to get knocked down.How to defeat the Mournful Giant
The enemy wields a huge tree branch and swings it in a wide arc. The giant can also breathe freezing air that immobilizes the Arisen or Pawns, so do not stand directly in front of its face when that animation begins. If a companion is frozen, do not keep attacking mindlessly. Help them break free first or the fight quickly becomes much harder.We recommend approaching from behind and climbing onto the giant's body. Broken weapons are lodged in it and can be pulled out to deal additional damage and disrupt its balance. Try to damage the tusks as well. Breaking them helps knock the creature down and creates openings for powerful attacks. Do not spend all your stamina on long combos in the blizzard. It is safer to use these damage windows and then back away.After winning, pick up the Mournful Giant's Tusk. This is the proof the Sphinx requested. Return to the Shrine of Wisdom and hand over the tusk when answering the Riddle of the Body. Solving it opens a chest containing a Norgan Portcrystal, which is useful for traveling around the new region.Riddle of the Soul: Where to find Fimbl and the Frozen Wyrmslife Crystal
For the second trial, the Sage asks you to find an eternal blizzard and a dragon whose blood has frozen in the cold. The clue points to the Beorcan Stronghold, which you already passed on the way to the Sphinx. The storm here does not end on its own, and the enemy you need is located deeper inside the fortress.How to reach Fimbl through the hidden passage
Return to the stronghold and find the large locked gate. It can be opened with two Beorcan's Twinned Keys, but you do not need those keys for the Riddle of the Soul. Instead of searching for them, face the gate and move left along the wall, past the frozen soldiers, until you reach an area with wooden logs. A hidden passage with a ladder down is covered by snow there.Break the snow covering or walk over it to reveal the entrance. Climb down the ladder, cross the lower rooms, and use the next ladder on the other side. This route takes you behind the locked gate to an area with a Riftstone. Continue climbing toward the upper part of the inner courtyard. Fimbl, the ice dragon responsible for the storm over the stronghold, waits there.Do not be surprised if you encounter references to the two keys while exploring. They really do open the main gate and provide access to additional treasure, but that is a separate objective and is not required to defeat Fimbl. If your goal is to continue the story as quickly as possible, the underground route saves you from an unnecessary detour.How to defeat Fimbl
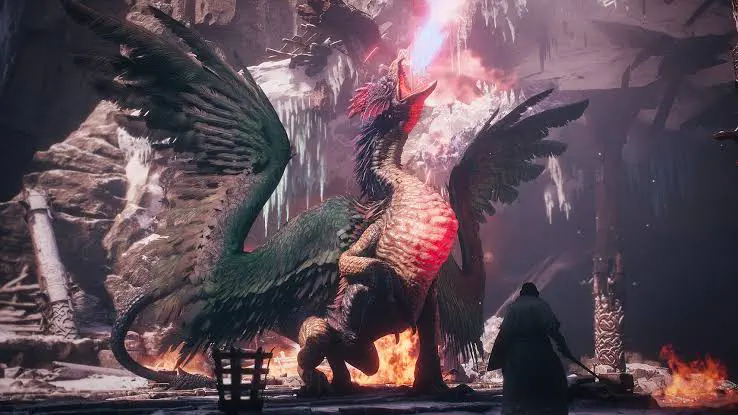
Fimbl is more dangerous than the previous boss and combines close-range attacks with ice magic. Ground slams send shards of ice across the arena, while the dragon can take flight and rain down lightning and chunks of ice on the party. At low Health, it gains a particularly dangerous attack: a prolonged hailstorm that steadily drains Health from the entire group. Reach the final bars with healing supplies left instead of an empty inventory.Fire is a useful choice for this fight. If your party has a Mage, try applying a Fire enchantment to your companions' weapons and keep it active during the battle. When Fimbl loses balance and exposes the heart on its chest, focus your attacks on that weak point. This can shorten the fight considerably and reduce the amount of time you spend under the hailstorm.After defeating the dragon, pick up the Frozen Wyrmslife Crystal. The blizzard over the stronghold stops once Fimbl is dead. Take the item back to the Sphinx and use it to answer the Riddle of the Soul. The chest for this trial contains Rift Crystals. VGC lists 3,000, while some other current English-language reward lists show a different amount, so use the number displayed in your version of the game.Riddle of the Will: Where to find the Decorative Brooch
The final trial sounds deliberately vague. The Sphinx asks you to bring back an item that embodies the will to defy ruin. In practice, this is the shortest of the three riddles because the item is lying in a place you have already visited during the story. Think back to the first encounter with the Fallen Dragon and the woman who intervened in the fight. That is where the Sage is sending you.Where to find the Decorative Brooch
Return to the Mountain Stronghold, where the battle with the Fallen Dragon took place. If you have unlocked the fast-travel point near the Rivercave Campground, use it to avoid repeating the long trek across the snowy roads. Enter the stronghold and return to the large arena from the earlier fight.Search the central and rear parts of the arena, especially the space beneath the large breach in the back wall. The Decorative Brooch is lying on the ground and is easy to miss against the stone floor. Pick it up, but be ready for an unpleasant surprise because a group of hostile creatures appears afterward.If the game lets you retreat immediately, leave with the brooch and save your healing items instead of wasting them on an unnecessary fight. If the way out is blocked, deal with the attackers and return to the exit. Published walkthroughs show slightly different behavior in this encounter, so the important part is not how you clear the arena but that you keep the brooch and leave the stronghold.Return to the Sage and hand over the brooch as the answer to the Riddle of the Will. Completing it opens a chest containing an Eternal Wakestone. This is an especially valuable reward, so remember to open the chest. Finishing the dialogue alone does not place the item in your inventory automatically.All rewards for the Sage Sphinx riddles
Each correct answer opens a separate chest behind the Sphinx. Unlike the Sphinx encounter in the base game, you do not need to solve ten conditions or fight the Sage for a final reward. You only need to obtain the three required items and hand them over.You also receive Gold and XP for completing the quests. Check all three unlocked chests before leaving. The small chests sit behind the Sphinx and are easy to miss if you immediately use fast travel.What to do after solving all three riddles
Once the Sage has received the Mournful Giant's Tusk, Fimbl's crystal, and the brooch, she finally shares what she knows about the nature of the Fallen Dragon. That completes the main purpose of meeting the Sphinx, but the story chain is not over. Return to the Norgandian Settlement and speak with Polyeidus to pass on what you learned.After the conversation, the search for the Sage concludes and the next story quest, Sealed History, begins. If it does not appear, first make sure you actually handed all three items to the Sphinx rather than simply defeating the two bosses and picking up the brooch. This quest chain tracks the delivery of the answers to the Sage, so a missed dialogue can easily look like a progression bug.One more quick tip:
As mentioned above, do not confuse these new trials with the Sphinx riddles from the original Dragon's Dogma 2 campaign. Their solutions, rewards, and requirements do not apply here.
Sign in to leave a comment or rate this post.
Comments
Be the first to comment!