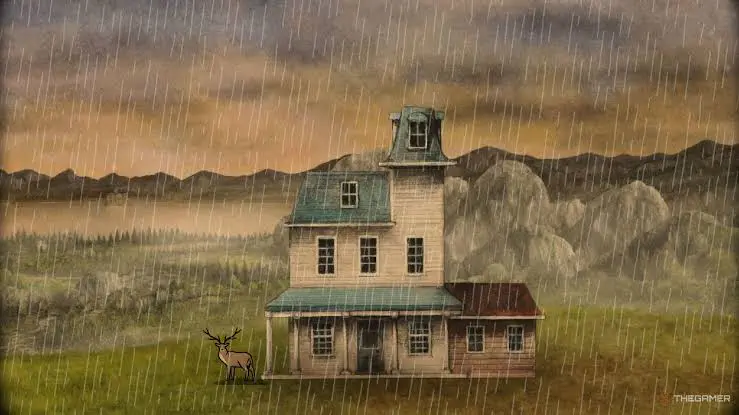
Finishing Servant of the Lake's main story doesn't mean you've uncovered everything hidden at the Vanderboom estate. Once the credits have rolled, an elaborate sequence of secret puzzles sends you back to specific scenes from all three days. You'll need to find Kate's additional letters, decipher unfamiliar combinations, and ultimately discover whom she's asking you to find.
Completing this chain unlocks the secret You've found him! achievement and an extra story scene that sheds new light on the servant and Kate's missing brother. It's the game's hidden ending, and reaching it requires much more than simply replaying the final chapter.You do not need to collect every other hidden achievement first. The essential prerequisite is to finish the main story and receive Kate's letter after the ending. That letter starts the entire sequence.
How to Start the Secret Ending Quest
Finish Day 3, including The Departure, and select Continue after the ending. Back in the carriage, you'll receive a new letter from Kate. Among its lines is an unusual clue about a crow waking at a particular time. This points to an earlier chapter in which you were able to set a clock.Open chapter select in the Servant's Notebook and return to Waking up Aldous on Day 1. You'll be revisiting several more chapters during this hunt, so pay attention to the chapter names given below.
Day 1: Waking up Aldous and the Secret Clock Time
During the normal story, you set Aldous's clock to 7:00 to wake him. Kate's letter calls for a different time: 4:05.Replay Waking up Aldous, take the clock hand from the little soldier figurine, and attach it to the clock. Set the short hand to IV and the long hand to I, so the clock reads 4:05. A new note will fall out.Read it. The writer describes a disturbing encounter with Alexandra, who called the servant into the bathroom and ordered them to open a suitcase. Inside was a severed human hand. This isn't just another unsettling detail about the Vanderboom family. It's your next puzzle clue.Remember the four objects mentioned in the letter, in this exact order:
Alexandra → bathtub → suitcase → hand
The Secret Bathroom Tile Combination
Go to Day 2 and replay Helping with Bathing. Approach the wall covered with illustrated tiles. You used these tiles to sort pictures into groups during the normal story, but the secret route requires a completely different solution.Press the pictures one by one in the order revealed by the letter: Alexandra, bathtub, suitcase, and hand. Once the sequence is entered correctly, another hidden note appears behind the wall.Its writer fears that something terrible is about to happen at the estate. They describe feeling trapped in a dark maze, desperately searching for a way out. Beneath the text you'll find a drawing of that maze, together with clues indicating left and right turns.Trace the route from the center to the exit, recording the direction of each turn. The resulting sequence is:
RRRLRLRRL
In full, that's Right, Right, Right, Left, Right, Left, Right, Right, Left. This nine-step combination opens a different box in another chapter.
Day 3: Open the Secret Compartment in Aldous's Laboratory
Return to Day 3 and select Assisting in Alchemy. Find the wooden box with two directional buttons. During the regular walkthrough, you opened it by pressing Left, Left, Right, Right, Left, Right. That solution won't reveal what you need now.Instead, enter the nine directions you worked out from the maze:Right → Right → Right → Left → Right → Left → Right → Right → LeftThe box opens to reveal another letter. The writer talks about becoming increasingly devoted to the Vanderboom family, while admitting that their yearly reunions are growing more frightening. The tension has become so severe that remaining at the estate no longer feels safe.The crucial clues aren't in the text itself. Examine the small drawings scattered around the letter. They form the basis of the next puzzle, which sends you back to the attic.
Day 1: Solve the Secret Constellation Puzzle in the Attic
Replay Searching the Attic on Day 1 and return to the locked constellation box. In the normal playthrough, you used three constellations associated with the building, the moon, and water. This time, ignore the view through the window. You need to construct new constellations using the symbols from the laboratory letter.Separate its drawings into three groups. The first group contains buildings, structures, and windows; their positions indicate the first constellation. The second group features two moons and gives you the outline of the moon constellation. The third combines symbols related to water, which together form the final pattern.How to Unlock the Secret EndingHow to Unlock the Secret EndingTransfer these three patterns to the matching positions on the box. Once all the constellations are correct, the hidden compartment opens with another letter inside.This one recalls Alexandra inviting the servant to old ruins in the hills. The place was in terrible condition, with bats everywhere, and appears to have been used for disturbing rituals. The writer remembers almost nothing about what happened there that night.Pay close attention to the unusual drawing on the letter. Its shape resembles the mechanism on a wine box you've already opened, so the next stop is the cellar on Day 3.
Day 3: Enter the Secret Wine Box Combination
Load Dressing up for Dinner and go down to the cellar. Find the mechanical box you used while preparing for the family dinner. The original solution required arranging its pieces into the number 1643.This time, don't enter that number. Look at the drawing on the note you found in the attic and rotate the box's pieces until their arrangement matches the symbol exactly.How to Unlock the Secret EndingHow to Unlock the Secret EndingThe box will open again, revealing another secret letter. It describes a strange dream in which three images are especially important:
A bronze staircase winding downward in a spiral.
A silver snake crawling across the ground.
A future son dressed in gold, with a mark on his forehead.
The colors identify three bottles on a shelf in the cellar. The images tell you which symbol belongs to each bottle.
How to Arrange the Three Bottles in the Cellar
Stay in the cellar and examine the shelf with the colored bottles. Don't reuse the arrangement required during the normal Day 3 story. The dream provides a different set of matches:
Bronze bottle: the spiral symbol, representing the winding staircase.
Silver bottle: the S-shaped symbol, representing the snake.
Gold bottle: the triangle with a horizontal line, representing the mark on the son's forehead.
How to Unlock the Secret EndingHow to Unlock the Secret EndingMove each bottle to its corresponding symbol. Once they're all in place, one of the barrels opens, revealing a passage. Climb inside to reach a room that wasn't accessible during the usual playthrough.
Find the Hidden Room and the Final Letter
Examine the strange room behind the barrel. You'll find a red cloth, a mask, and a small locked box. Shake the red cloth repeatedly until another note falls onto the shelf, then pick it up and read it.Instead of giving you a ready-made combination, the note contains four separate clues. Each one corresponds to a number you encountered while solving puzzles during the three main days. Taken together, those numbers form a four-digit code for the box.
First Digit: The Crosses in Alexandra's Letter
The first drawing shows several crosses, like those used in the letter puzzle during Helping with Bathing on Day 2. Find the earlier letter again in your notebook and compare its numbers with the positions of the crosses on the new note. The crossed-out positions eliminate the wrong choices.Only one digit remains: 6. That's the first number of the lockbox code.
Second Digit: The Window in the House Painting
The next drawing resembles a particular window. It's a reference to the painting of the Vanderboom house from Preparing Coffee on Day 2. Look at the windows in that picture and identify the one whose shape matches the drawing on the secret letter.It's the window at the very top of the house. The number associated with it is 2, giving you the second digit.
Third Digit: The Eye from the Hunting Puzzle
The third clue looks like a human eye. Think back to Going Hunting on Day 2, when you matched body parts and the five senses to Roman numerals.The eye represented sight and corresponded to IX, or 9. That's the third digit.
Fourth Digit: The Alchemy Symbol
The last drawing refers to one of the alchemical symbols you decoded during Assisting in Alchemy on Day 3. The symbol in question means 4.You now have all four numbers. The complete secret code is 6294.
How to Get the Telescope
If you left the chapter to check any of the earlier clues, reload Day 3's Dressing up for Dinner. Return to the cellar, use the secret bottle arrangement to reopen the barrel, and enter the hidden room behind it.Approach the locked box and enter:
6294
Open it and take the telescope. This is the final item required to finish the hidden puzzle chain. Don't leave the chapter yet: the last interaction takes place nearby.
How to Unlock the True Ending in Servant of the Lake
Head back toward the room with the stairs and the white bust, then take the passage to the left and examine the window near the dining room. Open the window and use your newly acquired telescope.Look toward the distant ruins and move the view upward, searching the windows of the building. When you find the window that lights up, click it. This completes Kate's search, reveals an additional story scene connected to her missing brother, and unlocks the You've found him! achievement.